Friday, July 30, 2010

Ratatouille, like in the movie


Ratatouille, one of my favorite movies and a dish that incorporates all kinds of vegetables that I love...and Jay hates. Well, it's summer and the components of ratatouille (zucchini, squash, tomatoes, eggplant) are in season and gorgeous. I also just stumbled on a blog post that presented the usually rustic chopped vegetable dish in a way that was just like in the Disney movie. Feeling inspired, I thought I would make my boys suffer through ratatouille for dinner and came up with my own variation. And, surprise! Jay actually really liked it (I would consider going back for thirds a success!). It's healthy, delicious and can take you on a mini-escape to the French countryside--even if all that gets to go are your taste buds...

Fancy Ratatouille (a la Remy)

3 tablespoons olive oil, divided
1 cup canned diced tomatoes
garlic powder (about 1/2 teaspoon), divided
fresh ground pepper and salt to taste
1 teaspoon dried thyme (about 1 teaspoon), divided
1 small zucchini
1 small yellow squash
1 small eggplant (Italian variety is nice since it's similar in size to the squash)
1/2 red bell pepper
1/2 red onion, finely diced
1/4 cup Parmesan cheese (optional)
1/4 cup fresh basil leaves, thinly sliced (optional)

In a shallow baking dish (I used an oval shape about 1o inches across), spread the canned tomatoes along bottom. Sprinkle diced onion on top. Drizzle 1 tablespoon olive oil and sprinkle a fine layer of half of the garlic powder (about 1/4 teaspoon) and thyme (about 1/2 teaspoon) over tomatoes. Season generously with salt and pepper and stir to combine. Set aside.

On a mandolin (or using a food processor, the slicer function on a cheese grater or if all else fails, a sharp knife), slice the zucchini, yellow squash and eggplant as thinly as possible. Slice the bell pepper into very thin strips as well.

Over top of the tomato mixture, start to layer the vegetables, alternating and arranging in layers following the outline of the dish.


Continue to arrange vegetables concentrically (Silas said "like a snail train") until you have filled the dish. You may have some leftover veggies. Once you have filled the entire dish, sprinkle again with an even layer of garlic powder (about 1/4 teaspoon again) and the thyme (about 1/2 teaspoon). Sprinkle with more salt and pepper and drizzle with remaining olive oil.

Cover with foil and bake at 375 degrees for about 40 minutes or until the vegetables are tender, but still have some structure. Or, if you're pinched for time (like me, I had assembled it earlier in the day, we went to playgroup and got home right before dinnertime), you can also cover with plastic wrap (use labeled microwave-safe wrap and avoid letting the wrap touch the food directly), microwave on high for 10 minutes remove plastic wrap and replace with foil and then finish for about 10 minutes in the oven.

Garnish with shredded Parmesan and basil leaves.

We served it over whole wheat cous cous (cook according to package directions using chicken broth instead of water and adding one tablespoon of butter) and with grilled chicken. I also put some crumbled feta cheese over some of it as an afterthought, and that was pretty fantastic, too!
Wednesday, July 28, 2010

Barbecued Corned Beef and Other Things


Big ol' slab of meat and some veggies grilling

The other night, we had a couple over for dinner that I hadn't met before. Jay had met them through another set of friends and thought we should get together. Whenever we have someone new come for a meal, I always try to find out if there's anything specific they're allergic to or absolutely cannot eat. It helps relieve anxiety in my meal-planning process.

Anyway, except for a honeydew sensitivity, they were willing to try anything and so I took to my fridge to see what melon-free meal I could serve. I had found a corned beef brisket for super cheap and it wasn't going to fit in my freezer, so I decided to barbecue it for our new friends. Along side, I used what we had in the fridge (I seemed to have an abundance of single, random vegetables) and served some balsamic grilled vegetables (one of my summer favorites) and a thrown-together salad that took on a bit of a Greek identity (and baked potatoes, but I don't think anyone needs a recipe for a baked potato). Eclectic? Yes. Delicious? We thought so.

Just don't ask me about dessert. They always tell you not to try out new recipes on company (I never listen). This time it bit me in the bottom and I resorted to pulling out some cupcakes from the freezer that were courtesy of Jay's Grandma (Grandma makes a mean cupcake). Here are the recipes I can take credit for:

*The pictures were not what I was hoping for, but I felt a little weird taking too many pictures of my food right before I was serving it to people I had just met. Plain weird.


Grilled Corned Beef Brisket
1 corned beef brisket (mine was a flat cut and almost 5 pounds)
non stick cooking spray
your favorite barbecue sauce

Directions:
Empty package of corned beef along with juices and seasoning packet into a large pot and cover it with water. Remember to actually fish out the seasoning packet and open it up (mine was stuck under the meat and I didn't see it for awhile...have I just lost some credibility with a lot of you?). Bring to a boil and then reduce heat to low and simmer for 2-3 hours or until beef is fork-tender. If you were celebrating St. Patrick's Day in the traditional way (not green beer traditional but Corned Beef and Cabbage traditional), it would be ready to serve along with the potatoes and veggies you had thrown in at some point. But we're not doing that, we're grilling this baby. Remove brisket from water, give it a coat of cooking spray and toss it on a grill (or grill pan...heck, probably the broiler would even work here!) for a few minutes on either side. We're really just looking to sear the outside so it gets crispy. Brush with barbecue sauce and allow to glaze on there a couple minutes more. Remove from heat. Allow to rest for about 10 minutes, then cut into thin slices against the grain.

Notes: Four adults and two kids barely ate half of the brisket and so there was a ton leftover. For which, I will post again on soon...

Grilled Balsamic Vegetables
1 red bell pepper, cut into bite sized chunks
1 zucchini, cut in half length-wise and thinly sliced (like half-moons)
1 yellow squash, cut in half length-wise and thinly sliced (half-moons again)
1/2 red onion, cut into bite sized pieces
1/2 cup mushrooms, halved or quartered, depending on the size
Canadian steak seasoning or salt and pepper to taste
non-stick cooking spray
1/4 cup prepared balsamic vinaigrette dressing

Spray a grill pan (or a disposable cake pan with holes poked in it) with non-stick cooking spray. Toss vegetables together and spread in a single layer. Sprinkle with seasonings. If you have more vegetables than will fit in a single layer, just cook in batches. Grill over high heat until vegetables start to blacken on the bottom . Flip with a spatula and continue to grill for a few minutes more. Vegetables should be crisp-tender (total time will be about 10 minutes or so). Remove from heat, transfer to a bowl and pour balsamic vinaigrette over top of veggies tossing to combine. Serve warm (but cold leftovers from the fridge are pretty tasty, too).

Greek Style Salad:
Toss together any combination of:

1 head Romaine lettuce, washed and torn into bite-sized pieces
2 roma tomatoes, halved and cut into slices (half moons)
1/2 cup canned garbanzo beans, drained and rinsed
1/2 English cucumber sliced into half moons
1/4 cup thinly sliced red onion
1/4 cup olives
1/4 cup crumbled feta cheese
1/4 cup thinly sliced red bell pepper
2 scallions, thinly sliced
a few fresh basil leaves torn into small pieces
Bottled Greek Vinaigrette dressing (sometimes I'll make my own and sometime I'll post that...tonight it was Girards brand)

If I had remembered they were in the fridge, I would've put some sliced pepperoncini in there as well.

And, the next day for lunch, I put the leftover cold balsamic veggies over top of the remaining salad and it made me very happy indeed!


Tuesday, July 27, 2010

West African Style Loaded Sweet Potatoes

This is definitely one that tastes better than it looks.

Inspired by a recipe in Cooking Light, I modified this recipe from a side to a vegetarian main dish. The flavors are really unique and addictive and I almost always have all the ingredients on hand. And, if you microwave the sweet potatoes, it can come together in about fifteen minutes. Score!

West African Style Loaded Sweet Potatoes:

1 tablespoon olive oil
1/2 medium onion, finely diced (about 1/2 cup)
1 tablespoon fresh ginger, peeled and grated
2 garlic cloves, minced
1 teaspoon ground coriander
2 teaspoons ground cumin
1/8 - 1/4 teaspoon ground cayenne pepper
salt and pepper to taste
1 teaspoon sugar
1/3 cup peanut butter
1 15 oz. can diced tomatoes (garlic and onion are nice, but you can use plain, too)
1/3 cup water
1 cup canned garbanzo beans, drained and rinsed (about 1/2 a 15 oz can)

fresh chopped cilantro
4 medium sweet potatoes, scrubbed clean

Prick potatoes with a knife or fork to allow steam to release and cook in microwave until tender (approx. 10 min, depending on size of potatoes). You can also bake them or do some combination of microwaving and baking since baking creates a much more tender, caramelized flavor (microwave until tender and then place in a 400 degree oven on a piece of foil so they don't drip and cause a huge mess and bake until they're really soft).

While the potatoes are cooking, prepare the sauce. In a large skillet over medium high heat, saute onion in olive oil until almost tender. Stir in ginger and garlic and saute for one more minute. Stir in coriander, cumin, cayenne and salt and pepper. Cook for about one more minute, stirring constantly. The spices should be very fragrant at this point. Add peanut butter and stir to melt. Add tomatoes, sugar and water. Bring to a boil and then reduce heat to low. Cook over low heat until sauce thickens, a couple of minutes. Add garbanzo beans (did you know garbanzo beans and chick peas are the same thing, just different names?). Stir to combine and allow to heat through once again.

To serve, split open the sweet potato. Top with about 1/2 cup of sauce per potato and sprinkle chopped cilantro over top.

30 minutes starts now!

So something a little strange happened the other night. I was preparing dinner and the doorbell rang. Ugh. Solicitors. Of course my first born raced to the door so I couldn't feign not being home and I felt like I had to answer the door. It was two young men from the inner city who were selling the magazine subscriptions, you've seen them before, right? So some of you may be thinking to yourself, "This is the time you just tell them that you're not interested and politely remind them soliciting is against one of the many statutes of our fine community." Unfortunately, I sometimes seem to have a hard time being direct in saying "no."

Anyway, when I told them I was fixing dinner, they asked if I might have any extra. Ha, ha, ha, funny joke, right? No, they were serious. Subscriptions I could not purchase, but my husband and I figured we could come up with something to feed them. Of course we had just polished off the sandwich fixings earlier that day, so it was going to take a little bit of inventiveness. I had Jay tell them to come back in 30 minutes and we'd have something to feed them. What commenced was a very frantic raid of the kitchen. This is what I came up with:

Of course it didn't look like that, though. This was frantic remember???
If we're being truthful, it looked exactly like this:

Slap, slap, slapped together.

The lesson of this is twofold:
First: Even when you don't think you have anything to come up with a fast, easy meal, you probably do and you really can do it!

Second: And somehow, when I agreed to feeding these guys, what was running through my head is the story in Genesis 18 where Abram has a divine appointment with some visitors (check it out!). It's possible that their knocking on the door right at dinnertime was just an inconvenient coincidence. But then again, I'm not sure that I believe in coincidences. Regardless, it was a reminder to me that I can show hospitality in some small way to everyone who crosses my path (especially at dinnertime).

Oh, and this was actually done in about 20 minutes!

Sweet and Tangy Grilled Pork Quesadillas
serves two hungry fellows

2 boneless pork chops
Canadian Steak Seasoning
4 tortillas
2 Tablespoons apricot jam
2 Tablespoons brown mustard
1 cup shredded cheese (I used a Mexican blend)
chopped cilantro (this was just used in the pretty, re-made version)

Sprinkle seasoning on both sides of pork chops and grill 3-5 minutes on both sides, or until cooked to about medium-well. Remove from heat and allow to rest for a few minutes.

While pork chops are cooking, stir together jam and mustard. Set aside.

Lay one tortilla in a large skillet over medium high heat. Spread about a tablespoon of the jam mixture on the tortilla and sprinkle with about 1/4 cup of cheese. Allow the cheese to start melting while the tortilla is still open-faced. Slice pork into small strips. Sprinkle on top of melting cheese. If you like cilantro, this is a nice time to sprinkle some of that over the quesadilla as well! Use a spatula to fold the quesadilla in half. Remove from heat and keep warm in a 200 degree oven. Repeat with remaining ingredients. Slice into wedges and serve!

Note: Hopefully, (if you don't do this already) this should open up a whole world of quesadilla options for you! Feel free to substitute different meats, cheeses and fillings. You can use the mustard-jam option with deli ham, cheese and thinly sliced pear or apple. We're particularly fond of spreading pesto sauce, using deli turkey, fresh spinach, slices of red bell pepper and Italian cheese blend.

Once you've experimented, please let me know what your favorite combination is so we can try it out too!

Sunday, July 25, 2010

Spanikopita Video


Ok, if I'm being totally honest, I feel a little self-conscious posting this. I don't mind talking to the camera, but don't love seeing myself on video. Still, it's something I thought I'd share (maybe purely for your entertainment/laughing pleasure?).

This is a cooking video I submitted on You Tube for a contest for Food Network.
The parameters of the challenge meant you have to keep your video under three minutes. They're picking fifteen finalists that will be announced and up for public voting starting next week. There are some really good entrants, so I feel like my chances might be as good as David's pet lamb against Goliath, but hey, I had fun making it and am thankful to my Dear Husband for all of his sweet camera and editing work! Somehow, I missed taking a picture close up of the spanikopitas, but hopefully, you get the idea from the video and the recipe below!

Spanikopita (Greek spinach and feta pies)

8 oz. frozen chopped spinach
1 Tablespoon olive oil
1/4 cup red onion, finely diced
3 green onions, thinly sliced
1/2 teaspoon garlic powder
1/8 teaspoon ground nutmeg
salt and pepper to taste

1/2 cup ricotta cheese
1/2 cup crumbled feta cheese
1/4 cup mozzarella and Parmesan cheese mixed together

1 package filo dough sheets, thawed
butter flavored or olive oil non-stick cooking spray

Thaw and drain chopped spinach. Make sure to squeeze out all excess water (this will keep your pastry from getting soggy when baking). In a large skillet over medium high heat, saute red and green onion in olive oil until translucent and almost tender (2-3 minutes). Add spinach, garlic powder, nutmeg, salt and pepper. Stir to combine and remove from heat.

Preheat oven to 375 degrees.
In a separate bowl, combine cheeses. Add spinach mixture and stir until combined.

Unwrap the filo dough and unroll to spread it out flat. Make sure to keep the sheets that are not in use covered with a damp towel to keep from drying out and becoming brittle. On a cutting board, take one sheet, lay it flat and cut the sheet across the shorter side into quarters so you have four strips of dough. Spray the sheets with the cooking spray until evenly and thoroughly coated. Place about a tablespoon of spinach-cheese mixture in the center of the bottom edge of a strip of filo dough. Take a bottom corner and fold it up so that you create a triangle. Continue to fold in a triangular fashion until you reach the end of the strip of filo, tucking the ends under when finished folding. Repeat until you've used all the filling.

Place in a single layer on a baking sheet coated with cooking spray. Spray the tops of the spanikopitas with a final dusting of cooking spray. Bake in a 375 degree oven for about fifteen minutes or until golden brown and crispy, turning half-way through.

p.s. For my Denver friends, I picked up the filo dough and feta cheese from Arash International Market (Parker and Yale in Aurora). You can get bulk feta cheese there for $2.99 a pound

Saturday, July 24, 2010

Tortilla Espanola


This is an ode to my sister, Elise. She's been on my mind this weekend as she moved to Chicago, ready to start medical school next week. I'm so proud! Anyway, she studied for a year in Spain while she was in college and so thus, Spanish food now reminds me of her.

Tortilla Espanola (or a Spanish Tortilla), is actually like a large potato omelet. It's one of the most common tapas dishes (or "little plates") that are such a part of the cuisine of Spain. I don't know how authentic my tortilla is, but it's versatile, economical and a dish that is appropriate for any time of day.

Tortilla Espanola
3-4 medium potatoes, peeled and thinly sliced
1 medium onion, chopped
4 Tablespoons olive oil, divided
1/3 cup water
6 eggs, beaten
1/4 teaspoon garlic powder
salt and pepper
non stick cooking spray
sliced green onions for garnish (optional)

Season potato slices with salt and pepper.

In a heavy skillet over medium high heat, saute onions in one tablespoon of the olive oil until translucent (2-3 minutes) stirring frequently.

Stir the onions into the potato slices. Add one more tablespoon of the olive oil to the skillet and return the potato and onion mixture to the skillet. Add water and cover with a lid. Allow the potatoes to cook for a few minutes until they are almost tender (about five minutes). Remove lid and flatten mixture with a spatula.

Whisk together eggs, garlic powder and additional salt and pepper. Pour egg mixture over top of potatoes and move skillet around to allow the eggs to soak through to the bottom of the pan.

Allow bottom to brown (the sides will start to set quickly and you can use the spatula to lift and peek) for a couple of minutes. Then, cover again, lower heat and allow to cook through until eggs are set.

Once eggs are set, use a large plate to cover the skillet. Invert onto the plate (it might look a little bit ugly, you can use your spatula to repair it and flatten again). Wipe out the skillet, spray with non stick spray and heat the remaining olive oil over high heat, swirling to cover the bottom of the skillet.

Slide the tortilla back into the skillet and fry the bottom side to golden brown. Once the bottom is browned, once again place a large plate over the skillet and invert. Tortilla can be sliced into wedges like a pie or cut into bite sized pieces. It can also be served warm, at room temperature or even cold. Garnish with green onions.


Friday, July 23, 2010

Spring Rolls


I had it in my head that I had everything to make spring rolls for our small group night on Thursday. Well, I had almost everything. I realized that I was out of the rice noodles that go inside of the spring rolls. Looking through the shelves, I had ramen noodles or a partial box of angel hair pasta. I gave the angel hair a try and was pleasantly surprised--they really turned out pretty good! So, there's an encouragement and reminder to everyone: give yourself the freedom to substitute ingredients...you may find something that works great!

So, this is more of a "concept" than recipe. The beauty of spring rolls is that you can fill them with just about anything on hand. The wrappers are really just a vehicle for your fillings. In fact, if you can't find the rice paper wrappers (look in the Asian foods section) put your fillings in a tortilla and you have an Asian-style wrap!


Spring Rolls:

  • Rice Paper wrappers
  • Rice vermicelli (also known as "rice sticks") or angel hair pasta, prepared according to package directions and rinsed in cold water
  • carrots, cut into thin matchsticks
  • cucumber slices, cut into think matchsticks
  • lettuce leaves, torn into small pieces
  • any combination of fresh herbs: basil, cilantro, mint and thinly sliced green onion
  • cooked meat, seafood or tofu (traditional is often to have boiled shrimp and roasted pork, I used teriyaki tofu and leftover grilled chicken) (recipe for teriyaki tofu below)
Dipping Sauce: combine:
  • 1/4 cup hoisin sauce (like an Asian barbecue sauce, found in...wait for it...the Asian foods section)
  • 2 Tablespoons soy sauce
directions:
Make sure to have all ingredients set out and within arms reach ready to assemble (the cooking term for this is "mise en place," or everything in its place). Dip individual sheets of rice paper into a shallow dish of warm water until slightly softened (about 5 seconds). Lay flat on a cutting board. Then, layer fillings lengthwise across the center of wrapper. It's most attractive to put the protein first, then layer with the carrots and cucumber, herbs and greens and finally, a small mound of the cooked noodles. Take one side of the rice paper wrapper and fold up over the fillings. Like you're folding a burrito, then fold in the sides and finally, fold the long end over both folds. The wrapper is a little bit sticky, so you can lightly press the sides together and they'll hold together. Please tell me you've folded a burrito before, because that was a pretty terrible description of folding! Serve chilled with dipping sauce.


Teriyaki Tofu:
1 package extra firm tofu
1/4-1/2 cup of your favorite teriyaki sauce*

Open tofu package and drain water. Cut tofu into 1/2 inch slices. Place in a gallon-sized freezer bag in a single layer.
Freeze until solid (or whenever you're in the mood for some tofu steaks).
Remove from freezer and thaw in the fridge.
Once thawed completely, squeeze out excess water. Put back into bag, add teriyaki sauce (or favorite marinade) and allow to marinate for at least 30 minutes (up to 24 hours).
Spray a skillet (or grill pan or George Foreman grill) with non stick spray and over medium high heat, sear tofu slices until browned (about 5 minutes). Flip and brown on other side. For spring rolls, chill or allow to come to room temperature.

(*I am a big fan of the Soy Vay products, but Trader Joe's makes a good one and even King Soopers carries a Kroger brand of teriyaki glaze that's pretty good)

Thursday, July 22, 2010

Green Bean Salad with Fresh Tomato Vinaigrette and Feta


Hmm...I'm tired and keep hearing rustling coming from the baby monitor...

Here's a quick post of a salad I made tonight as part of the pot luck for small group. The recipe is inspired from (again--I dearly love this book) "The Best of Cooking Light" and is about as seasonal as you can get at the moment. The beans came from our dear little Berry Patch Farm, which is why there are also yellow wax beans in the salad (they look so pretty, but are definitely not a necessity). They actually sell purple beans there too! Have you ever seen those before? They're a deep eggplant color when raw but turn green after cooked. I very much love fresh green beans, feta and basil, so I can tuck away quite a bit of this stuff. Good news is, it's healthy, right?

Green Bean Salad with Fresh Tomato Vinaigrette and Feta

1 lb. fresh green beans (or mixture of green and yellow wax), washed and trimmed

Vinaigrette:
2 Tablespoons balsamic vinegar
1 Tablespoon olive oil
1/4 teaspoon garlic powder
salt and fresh ground pepper to taste

1/2 cup chopped fresh tomatoes (the little grape ones halved and quartered are pretty)
1/4 cup feta cheese, crumbled
1/4 cup fresh basil leaves, thinly sliced into ribbons (chiffonade)

Directions:
Steam green beans until crisp-tender (only a couple of minutes, you just want to take the raw taste off of them). Rinse or immerse in cold water to stop them from cooking (the term for this is to blanch). Place beans in serving bowl.

In a small bowl, combine vinegar, garlic powder, salt and pepper. Drizzle in olive oil, whisking until smooth. Stir tomatoes into dressing. Pour dressing over green beans. Finally, sprinkle feta cheese and basil over top. Serve cold or at room temperature.

How easy is that? And, to whet your appetite (or warn you, whichever the case may be...), coming soon will be posts on spring rolls and a tortilla Espanola!

Tuesday, July 20, 2010

Pi-Co De-Gall-o


Pretty, Pretty Pico DeGallo...

I cannot take credit for this one...even though my husband might love this stuff more than just about anything except for Jesus. It is originally from the Pioneer Woman's food blog. But really, I mean, how many different versions of pico de gallo can you really come up with? It's pretty hard to be original after awhile! No matter how you dice it (ha ha, cause there's lots of dicing in this recipe!), it's pretty darn good and very time-appropriate since we are coming into full season of fresh tomatoes! With this secret unlocked, you will refrain from buying jarred salsa again and faint at the idea of spending $5 for a container from the refrigerated section. Finally, the quantities (even though I've made suggestions) are really to taste. Experiment away!

Pico De Gallo

5-6 Roma tomatoes, small dice
1/2 red onion, even smaller dice
1/2-1 jalapeno, even smaller dice (just kidding, I would call this minced!)
big handful of cilantro, roughly chopped
juice of half a lime
kosher salt to taste

Chop up tomatoes and put them in a large bowl. Dice up your onion and add to the tomatoes. Finely mince your jalapeno (as small as you can because the smallest, most sensitive person in the house will most likely get the spiciest bite!), add to the bowl. Chop up the cilantro and add it to the party. Squeeze the lime juice over the tomato mixture. Stir to combine and salt to taste. Who has the Tostitos? It's party time!

Note: I don't have a picture, but now that you have made traditional pico de gallo, try using fruit to make something a little more exotic! Again, credit ought to be given to the P.W.

Pineapple-Mango Salsa
1/2 fresh pineapple, diced
1 ripe but still firm mango, diced
1/2 red onion, finely diced
1/2-1 jalapeno, minced
big handful of cilantro, roughly chopped
juice of half a lime
kosher salt to taste

Mix all the ingredients together. You know the drill. This is especially delightful with grilled chicken, pork tenderloin or fish! Let the dining al fresco commence!

Better than a restaurant...and in just over 30 minutes!

Pork Milanese with Whole Wheat Spaetzle
and Baby Green Salad with Lemon-Mustard Vinaigrette


Having a husband from Iowa, I knew that he would be pretty excited if I tried to make ANY version of a breaded pork tenderloin (I think it might be the State dish and if it isn't it should be). Not only was he thrilled, I got rave reviews from both of my boys (the ones that are eating solid food, of course--the baby seemed to enjoy his pureed squash but was looking pretty envious). Even better, I dressed things up a bit (a usual tenderloin would be served on a bun with some combination of ketchup, mustard, pickles and onion), so I felt like it was healthier and company-worthy.

Also fun about this dish is that you can feel anywhere from humble to cosmopolitan depending on what name you give it and what you serve along side. "Breaded Pork Cutlet," totally down-home. "Pork Schnitzel," very Germanic. "Pork Milanese," so very sophisticated...anyway you call it, every single part of the meal was done in just over thirty minutes. See? No excuses! I think it gives "pork chop night" a whole new appeal! I've included the separate recipes for all the components and down below, I'll give instructions on how to prepare everything at the same time to be done in just over a half an hour.

Breaded Pork Loin:
4, 1-inch thick boneless pork loin chops
Canadian steak seasoning
3 Tablespoons all purpose flour
1 egg, beaten
1/3 cup breadcrumbs, unseasoned
1/4 teaspoon garlic powder
3 Tablespoons grated Parmesan cheese
2 Tablespoons olive oil

Directions:
Lay out a piece of plastic wrap big enough for each pork chop to be spaced about three inches apart and with some overhang. Lay pork chops evenly spaced apart. Cover with another piece of plastic wrap. With a meat mallet or rolling pin, take out any pent up aggression by pounding pork chops until they are an even thickness (1/2 to 1/4 inch thick).

In a shallow dish, mix together breadcrumbs, garlic powder and Parmesan cheese. Have beaten egg in another shallow dish waiting. Pull off plastic wrap and sprinkle steak seasoning on both sides of meat. Rub flour into each side of chop and then dip into beaten egg. Finally, dredge in breadcrumb mixture on both sides.

In a large skillet, heat olive oil over medium-high heat. Place pork chops in a single-layer in skillet and brown about three minutes. Flip and brown on other side (lower the temperature a bit if getting browned too quickly) about 3.5 minutes. Voila! Your pork is finished!

Whole Wheat Spaetzle:
3 eggs
1/2 cup milk
3/4 cup whole wheat
3/4 cup white flour flour
3/4 teaspoon salt
2-4 Tablespoons butter, depending on taste
chopped fresh parsley (optional)

Fill a medium sauce pan with water and bring to a boil. Reduce to a simmer. In a medium-sized mixing bowl, beat eggs until well combined. Whisk in milk. Combine flours and salt and whisk into egg mixture. It should look like thick pancake batter. Take spoonfuls of batter and using a spatula, scrape the batter across the large holes of a cheese grater into the simmering water. It will form small, irregular-shaped dumplings that will sink to the bottom and then quickly rise to the surface again. Give a gentle stir and then, with a slotted spoon, remove spaetzle dumplings and place in a bowl to hold. Repeat process until you've used up all of your batter. Melt butter in a large skillet over medium-high heat. Place spaetzle in skillet in a single layer. Allow to brown (2-3 minutes) in butter and then turn to brown on the other side. Remove from heat and toss with parsley to garnish

Baby Green Salad with Lemon-Mustard Vinaigrette:
1 clove garlic, peeled
1 teaspoon kosher salt
2 Tablespoons stone ground mustard
3 Tablespoons lemon juice (about one lemon), reserving zest for garnish
3 Tablespoons extra virgin olive oil
fresh ground pepper to taste

1 bag of salad greens (I used one that was on sale at the supermarket, Mache, it's sort of like a combination in texture and flavor of spinach, watercress and arugula). Baby spinach or arugula would go beautifully, but use what you can find!

Remove zest from lemon and set aside. On a cutting board, mash down on garlic clove with the side of a large kitchen knife. Chop into smaller pieces and then sprinkle salt over top. Using the side of the blade again, drag the salt through the garlic pieces repeatedly to form a paste out of the garlic and salt (this way you won't have sharp bites of garlic pieces in your dressing). Scrape garlic paste into a small bowl. Whisk in mustard and lemon juice and stir to combine. Finely drizzle in olive oil while whisking constantly to form a smooth vinaigrette. Season with fresh ground pepper. Toss with salad greens. Feel free to garnish with lemon zest or fresh tomato for color.

Meal Preparation Instructions:
Bring spaetzle water to a boil. While waiting for water to boil, pound out and bread pork chops as well as mix together spaetzle batter. Let pork chops rest while you are simmering spaetzle. Then, after all the spaetzle have been cooked, brown pork chops. While pork chops are browning, prepare salad dressing. Flip the pork chops and brown spaetzle in another skillet (or wait until the pork chops are out of the skillet and use the same skillet to melt the butter and brown the spaetzle). Toss dressing with salad and you're ready to plate! Ha! Don't you feel like Rachael Ray???

Sushi Roll Salad


For those of us who love a good California Roll, here's all the components mixed up in a delicious, summery salad. This is one of our favorite recipes. It's adapted from one of my most beloved cookbooks, "The Best of Cooking Light." We just finished a big batch of this and I'm already thinking it's time to make some more. Yummy!
Sushi Roll Salad

2 cups uncooked sushi rice (or can substitute a short grain variety)
2 1/2 cups water
1 teaspoon kosher salt

Dressing:
1/2 cup rice vinegar
1 Tablespoon vegetable oil
1 Tablespoon sesame oil
1 Tablespoon soy sauce
1 teaspoon fresh ginger, peeled and grated
1 garlic clove, minced
1 Tablespoon sugar
1/4 -3/4 teaspoon prepared wasabi (Japanese horseradish), optional

Other ingredients:
1 cup cucumber, julienne-cut
1/4 cup minced red onion
1 8oz package flake-style imitation crab
1 small avocado, diced
1 Tablespoon sesame seeds, toasted
sheets of toasted nori (seaweed), cut into strips

Directions:
Combine , salt and rice in a medium sauce pan or rice cooker. Bring to a boil. Cover, reduce heat to low and allow to simmer until all the water is absorbed and rice is tender (about 20 minutes).

Once rice is cooked through, remove cover and allow to cool to room temperature. You can speed this process by spreading it out in a thin layer on a baking sheet.

While rice is cooking, prepare dressing. Whisk together all the ingredients in the bowl you will be serving the salad in. Stir in rice, cucumber, onion and crab. Toss to combine. Sprinkle evenly (or dish into individual bowls) with the avocado, sesame seeds and nori to garnish.

Notes: you can also substitute imitation lobster for the crab. Black sesame seeds are especially pretty in this salad but somewhat harder to find. Currently, Trader Joe's has a toasted seaweed snack package for $.99 that is perfect for the strips of nori, but you can also find it in the Asian section of any major grocery store. Wasabi can be found in paste or powdered form (aslo in the Asian section of the grocery store). If you find the powdered form, mix desired amount with water to form a paste. Allow to sit a few minutes to allow flavors to develop, then stir into dressing. Finally, for a "Spicy California Roll," stir together 2 Tablespoons of mayonnaise and desired amount of Sriacha (or other Asian style spicy chili garlic sauce) and add to dressing mixture.

Monday, July 19, 2010

Back to Berry Patch Farms!

We are blessed to live fifteen minutes from an adorable berry farm that sells all sorts of locally grown fresh produce. They are open mid-June to November and it is one of our most favorite places to visit. You can cut your own basil, mingle with chickens and sample berries growing sweet in the sun. It is quaint, friendly and welcoming.
In my new quest to maximize our pantry-living, we were completely out of produce (except for a couple wilted beets in the bottom drawer) and so Silas, Judah and I made our first visit of the year to Berry Patch Farms today. Their berries won’t be ripe for a couple of weeks, but we picked our own basil and got some other vegetables. They had a special on Swiss chard (something I have not cooked often before, but have heard the health benefits of it), and I thought I’d give it a try.
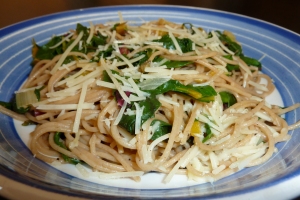
Swiss chard is a leafy green that is in the same family as beets and spinach. It has tender leaves and bright, multi-colored stalks (yellow, red and white). I have a serious supply of fresh garlic right now and I had a box of whole wheat spaghetti, so I threw them all together and it made something pretty magical! I am now a Swiss chard convert and hope you’ll give it a try as well!

Garlicky Swiss Chard and Whole Wheat Spaghetti

1 8 oz package whole wheat spaghetti (reserving half cup of pasta cooking water)
1 bunch swiss chard, washed and dried
4-5 cloves of garlic, roughly chopped
2 Tablespoons olive oil
salt and pepper to taste
1 teaspoon chicken base or 1 bouillon cube
2 Tablespoons butter
2 Tablespoons fresh lemon juice
1/2 cup shredded parmesan cheese, divided
2 scallions, thinly sliced
1/4 cup basil leaves, thinly sliced into ribbons
Cook spaghetti according to package directions, until al dente (8-10 minutes). Reserve 1/2 cup of the pasta cooking water and stir chicken base into it until dissolved.
Strip leaves of Swiss chard away from stems. Roughly chop stems and tear leaves into bite-sized pieces. In a large skillet over medium-low heat, slowly heat olive oil and garlic. When garlic is fragrant, add Swiss chard stems and saute over medium high heat until stems are tender. Stir in leaves. Season with salt, pepper and lemon juice. Add pasta and stir to wilt leaves. Stir in pasta water and butter and toss to combine until heated through. Add half of Parmesan cheese and stir one final time. Divide into pasta bowls and garnish with scallions, basil leaves and extra Parmesan.

Basil Chicken Salad

Today, at Super Target I cleaned up on meat. When you catch it right, you can get some killer deals there and all I have to do is make sure I have freezer space, since all of it has a pretty urgent use/freeze by date. The best deal of mine from this trip was two 3lb. packages of bone-in split chicken breasts for $1.99. That would be $.66 per pound folks. Like I said, killer.

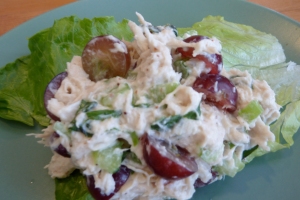
For tonight, I turned some of it into basil chicken salad sandwiches.
Forgive the cheesy picture…did serving salad on a lettuce leaf go out of style before or after 1982?

Basil Chicken Salad:
3 cups shredded cooked chicken
1/4 cup light mayonnaise
1/4 cup plain yogurt
2 Tablespoons Dijon mustard
1/4 teaspoon garlic powder
salt and pepper to taste
1/2 cup finely chopped celery
1 cup red grapes, halved
1/4 cup fresh basil leaves, thinly sliced.
Directions: In a medium sized bowl, combine mayo, mustard, garlic, salt and pepper. Add chicken and stir to combine. Stir in celery, grapes and basil. Mix just until combined. Serve on toast for sandwiches (ours had some avocado spread on the slices and leaf lettuce). It only took about 45 minutes and a slather of bbq sauce on top for Silas to eat his half of a sandwich, but don’t take his word for it…
Also, you really can omit the basil and then it's just chicken salad, but it really does add something!

Who Knew Rice and Beans Could Be This Good?


Having celebrated Easter not too long ago, we were on a serious ham kick (actually it was awhile ago, but with how quickly time seems to be flying maybe it just seems like it was a recent event). I was snagging them for under a dollar a pound and our poor house church was being subjected to every kind of ham dish under the sun. They’re such good sports. I am loathe to let a good ham bone or turkey carcass go to waste, and boiling the ham bone to make pinto beans is my most recent favorite application (for making turkey stock, my Minnesota roots demand to make Turkey Wild Rice Soup, but that is another post for another day…).

Pinto Bean and Brown Rice Bowls
1 ham bone
1 medium onion, quartered
1 pound bag dried pinto beans, washed and sorted
1 teaspoon dried thyme
2 teaspoons minced garlic, (or 1 teaspoon garlic powder)
1 teaspoon ground cumin
salt and pepper to taste, add just before serving

For serving:

hot, cooked brown rice
cilantro, chopped
shredded cheese
salsa
sour cream

Directions: In a large pot of water, boil ham bone and quartered onion for several hours until all the meat falls off of the bone. Strain through cheesecloth (or paper towels work pretty well too!) in a strainer into a large bowl or another pot. You can also pick through the meat and add any back to the broth, if you like. Let cool and refrigerate overnight. The next day, skim off any fat that has solidified at the top. Now, you have ham broth!

**you can also use chicken broth or water and a couple boullion cubes and skip this step**

For Beans: Wash and sort beans to remove any foreign debris. Soak beans according to package directions (I prefer the “fast” method of bringing beans and water to a boil, boil for one minute and then remove from heat and let soak while covered for an hour, although you can ). Drain water and rinse several times until water is clear. This will remove a lot of the “hard to digest” compounds.

In a large pot, combine broth, soaked beans, thyme and garlic. Bring to a boil, then reduce to a simmer and cook until beans are tender (about an hour). Once beans are cooked through, add salt and pepper and adjust any other seasonings (garlic powder, cumin, etc.). Occasionally, I’ll add some chili powder to taste as well.

To serve:
In a bowl, layer cooked brown rice, pinto beans and desired toppings.

Topping ideas: shredded cheese, salsa, diced avocado, sour cream, chopped cilantro, lime wedges

Other ideas for the beans (since they make a large pot and there’s only so many rice and bean bowls you can eat in a week–no matter how tasty they may be! : ):
use as a topping for nachos
filling for burritos
in chili
put in a gallon ziploc bag, lay flat and freeze

A speedy tip: Just use a can of pinto or black beans. Stir in a teaspoon of cumin, a half teaspoon of garlic powder and a squeeze of lime juice. Heat and serve over rice and top as you wish!

True Pantry Living


Ok, this is a long time in coming. I always have billed myself as a “bargain” cook and now I really have to put my money where my mouth is. Due to some new financial constraints, I am hesitant to spend money and, thus, go to the store right now. That means, it’s time to be extra resourceful and cook with what I have on hand at this moment. We went to a Birthday party this afternoon and gorged ourselves on Chik-fil-a (did you already know how delicious their chicken salad sandwiches are? I had no idea…I pity the fool who has no access to a Chick-fil-a!) and I managed to eat BOTH Jay’s and my dessert last night when we were out celebrating our eighth (EIGHTH!) anniversary at a Mexican restaurant (apparently, I DO have room for both churros and flan after eating an enormous vegetarian burrito. Shameful.). Anyway, the point of all that is I am thankful I don’t have to come up with something too substantial for dinner tonight. Here’s what I’ve managed to come up with:

Maple Roasted Sweet Potato and Spinach Salad with Bacon Mustard Balsamic Vinaigrette

6 oz. Bag of pre-washed baby spinach (love the stuff!)
6 slices of bacon, cut into 1 inch pieces and pan fried until crispy, reserving 2 Tablespoons of the drippings
1/4 c. red onions, sliced (soak onion slices in ice water for 10 minutes to remove the bite)
2 medium sweet potatoes, peeled and cut into chunks (slice 1/2 inch rounds and then quarter)
2 T. olive oil
kosher salt
2 T. maple syrup (thank you, Cracker Barrel and your adorable leftover bottles–it’s been a long time since I’ve been to Whole Foods to get bulk maple syrup)
1/2 cup blackberries, washed and dried
1/4 cup toasted pecan pieces

dressing:
2 T. stone ground mustard
2 T. maple syrup
2 T. bacon drippings
1/4 t. garlic powder
4 T. balsamic vinegar
2 T. olive oil
salt and pepper to taste

Preheat oven to 425 degrees. Toss sweet potatoes with olive oil and kosher salt, spread in a single layer on a baking sheet. Roast sweet potatoes for 25 minutes, or until browned and tender, turning once. Drizzle maple syrup over potatoes and roast for 5 additional minutes. Remove from oven and allow to cool to room temperature.

For dressing: in a glass measuring cup, whisk together mustard, syrup, drippings and garlic powder. Once combined, whisk in balsamic vinegar. Finally, slowly drizzle in olive oil until dressing is smooth. Season with salt and pepper to taste.

Assemble salad:
Layer spinach, sweet potatoes, onions and blackberries. Drizzle with vinaigrette and toss to combine. Sprinkle bacon pieces and toasted pecans over top.

And the verdict…Silas told me it was the “best dinner ever!” but I think he’s becoming very adept at trying to butter mommy up.

Also, I made spaghetti pie to bring to church tomorrow for lunch. Gotta love re-purposing the leftovers! Sorry, the picture is u-g-l-y...it really did taste better than it looks! I have a lot of room for growth in my food photography! Try as you might, a fresh basil leaf sometimes does NOT dress things up enough!


Spaghetti Pie:
1 lb. spaghetti, broken into thirds, cooked al dente
4 oz. cream cheese, softened
1/2 c. grated parmesan cheese
3 eggs, beaten
1 tsp. garlic powder
1/2 tsp. salt
1/2 tsp. black pepper

4 cups leftover spaghetti sauce
(jarred marinara, 1 lb. extra lean ground beef, 8 oz. frozen spinach thawed and drained, 1/2 package sauteed, sliced baby bella mushrooms)

1 c. Italian blend shredded cheese

Stir cream cheese into warm pasta. Beat together eggs, parmesan cheese, garlic powder, salt and pepper. Stir into pasta until noodles are thoroughly coated. Pour into greased round casserole dish. Level out the pasta. Spread sauce mixture over pasta and top with shredded cheese. Bake, covered at 375 degrees for 45 minutes. Remove foil and bake 5-10 additional minutes or until cheese is melted and browned.

Hello, World!

This has been a long time in coming...I have to admit, I'm a little afraid of technology, so please be patient. Anyway, I hope that you'll find something tasty here somewhere in my Open Fridge...