Tuesday, August 30, 2011

Peach Banana-Berry Smoothies

Silas, my five year old, has just discovered his first loose tooth.  Loose teeth really give me the shivers. They are just plain creepy.  He is constantly wanting to show me its wiggly progress which makes me cringe.  His loose tooth has given him a bit of trouble when eating.  As the nice mother I am, I made these smoothies to give him an easy to eat breakfast (although maybe to expedite the loose tooth falling out process, perhaps I should be serving him whole apples to bite into...).

This recipe is obviously just a starting point.  Smoothies are a great opportunity to use just about any combination of fruits (and vegetables!) you have available.  Feel free to mix, match and customize!  I've gotten used to throwing in a handful of fresh spinach leaves and a spoonful of ground flax seeds to sneak in even more nutrition.  Those little extras are completely optional, but I can assure you that they blend right up and don't affect the flavor a bit.

Also, as I've been highlighting quick, weekday breakfasts, a smoothie recipe definitely needs to be included! 
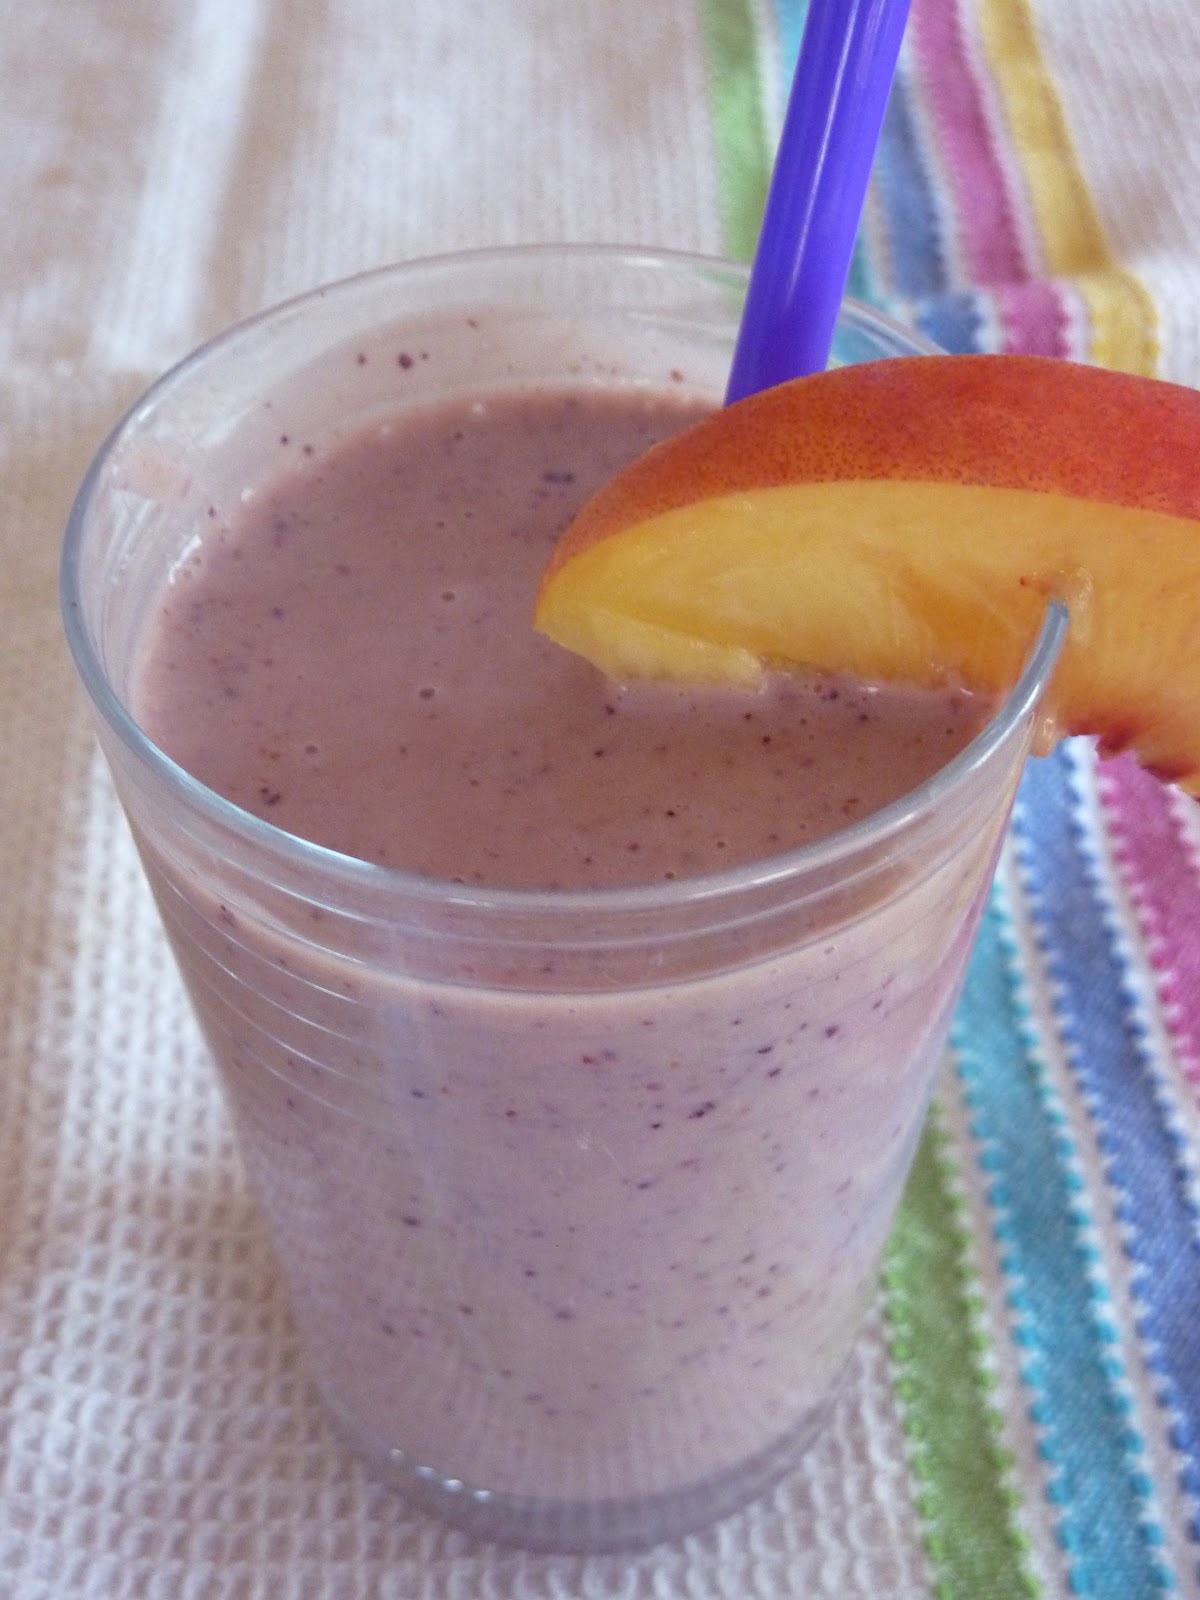
Peach Banana-Berry Smoothies
makes about 3 cups
1 banana, peeled, frozen and broken into chunks
1 cup frozen blueberries
2 whole peaches or nectarines, pit removed and cut into chunks
1 cup plain yogurt
1 tablespoon ground flax seeds (optional)
1 handful fresh spinach leaves, washed and dried (optional)
milk or fruit juice as needed

In the pitcher of a blender, place in order: yogurt, peaches, blueberries, banana chunks, spinach and flax seeds (basically, you want the more juicy kinds of fruit and any liquid on the bottom.  Blend on high speed, stopping and scraping down any stubborn pieces of fruit as needed, until smooth.  If mixture is especially thick, you can add a splash of milk or juice.  If it is too thin, a few ice cubes can help. Pour into glasses and enjoy, drinking through straws preferable. 

Note: I like to put any fruit that is starting to get close to past its prime into smoothies.  If I'm not going to use it right away, it's great to freeze it in chunks and have it ready to throw into the blender at a moment's notice.  Once bananas are overripe, I will peel them, place them in baggies and throw them in the freezer. 

Also, lots of surprising fruits are great in smoothies---try whole grapes, chunks of cantaloupe or honeydew, kiwi, peeled oranges, pineapple, kiwis, mango...I know a friend who always throws a few baby carrots into hers and another friend who puts raw beets into her smoothies (I hear they make it a lovely pink color, but I've yet to try). 

Sunday, August 28, 2011

Back to School Breakfast Ideas


We're in that time of year, school is starting and the morning routine becomes a bit more hectic. When I was a kid, weekday breakfasts consisted of a bowl of Cocopuffs or Bisquick pancakes.  Not that those childhood breakfasts have left me feeling deprived or anything, but these days I like to start our mornings with something a bit more special.  In this case, special doesn't mean hard work though.
I'm working on a more accessible recipe index, but in the meantime, I thought I'd suggest some quick and easy breakfast ideas.  After all, it is the most important meal of the day!  

Muffins and Breads


  • Make up batches of muffins or bread and once cooled wrap and freeze individual muffins or slices of bread so they're ready to "grab and go."
  • Freeze your leftover weekend pancakes and reheat in the toaster for a quick weekday bite 
  1. Best Blueberry Muffins
  2. Mini Pineapple Muffins with Coconut Crumble 
  3. Lemon Butter Muffins 
  4. Banana Bran Muffins  
  5. Maple Almond Butter Cookies
  6. Date Nut Bread 
  7. Cinnamon Banana Bread
  8. Perfect Pancakes
Cereal and Yogurt

  • For a money-saving option, buy the 32 ounce containers of yogurt and portion it in individual containers.  Packed with a side of granola in a baggie and a spoon, you're ready to leave in no time flat!  
  • For quick steel cut oats, see the note at the bottom of "Funky Monkey Oatmeal."

  1. Peanut Butter Granola
  2. Mango Ginger Granola and Short Cut Greek Yogurt
  3. Funky Monkey Oatmeal

Eggs

Keep a stash of hard boiled eggs in your fridge for a quick high protein bite or make up batches of breakfast burritos or egg sandwiches, wrap individually and keep in the freezer ready to microwave on a moment's notice.
  1. No-Fail Hard Boiled Eggs
  2. Breakfast Burritos
  3. Frizzled Eggs
  4. Homemade "Egg McMuffins": fry (or "frizzle" see link above an egg and layer on a toasted English muffin with a slice of cheese


Tuesday, August 23, 2011

Senegalese Style Peanut Stew


We had some friends we hadn't seen in a long time over for an impromptu lunch last week.  The ingredients I had on hand were for a dish I was wanting to make from my favorite vegetarian cookbook ("How to Cook Everything Vegetarian" by Mark Bittman).  A Senegalese-style (as in the African country of Senegal, where peanuts are a primary crop and sweet potatoes are also featured prominently--thank you, Wikipedia!) peanut stew (and a vegetarian one at that!) was not what I would have planned on serving company (why couldn't I have had some nice deli turkey in the fridge???). 

Anyway, our friends arrived and when they found out what I was making exclaimed, "You don't have to make something vegetarian just for us!"  Turns out, they've started eating primarily vegetarian and it was a very nice coincidence.  Over some very sweet catching up with our friends, we became such fans of this hearty, complex stew that I made it again this week (plus I needed to make sure to get a picture!). 

Serve it with a scoop of hot cooked rice or couscous to round it into a very satisfying meal. Here it's pictured with cooked millet which is a small, round grain found in African cuisine.  I found it at my local health food store, but familiar white rice was great with it.  It's so good, you'll be fighting over who gets to take the leftovers for lunch the next day!

Senegalese Style Peanut Stew
3/4 cup shelled, roasted peanuts, roughly chopped
2 tablespoons vegetable or peanut oil
1 tablespoon peeled and minced fresh ginger
1 tablespoon minced garlic
1 medium red onion, halved and thinly sliced
1/2 red bell pepper, diced
pinch of cayenne pepper, more or less to taste
salt and freshly ground black pepper
6 cups chicken or vegetable stock
2 (about 1 pound) sweet potatoes, peeled and cut into large chunks
1 15 ounce can diced tomatoes, with juice
1/4 cup peanut butter
1 bunch kale or collard greens, washed thoroughly and cut into wide ribbons
juice of half a lime
1/4 cup chopped cilantro

Heat oil over medium-high heat in a large pot.  Once hot, saute onion, bell pepper, ginger and garlic stirring occasionally until softened--about 3-5 minutes.  Add 1/2 cup of the peanuts, cayenne pepper and salt and pepper. 

Stir in the stock, sweet potatoes and can of tomatoes.  Bring to a boil, turn the heat down to medium-low and simmer, partially covered, stirring occasionally until the potatoes are tender, about 10-15 minutes.

Stir in the peanut butter and kale.  Cook just until the greens are tender--3-5 minutes.  Stir in lime juice and cilantro.  Taste and adjust seasoning and serve, garnished with the remaining peanuts and cilantro.  
Recipe Adapted from "How to Cook Everything Vegetarian" by Mark Bittman

Monday, August 22, 2011

Honey Mustard Baked Chicken Nuggets

This dish got me the best reception I've gotten in a long time--and that was even before we had started eating.  My 19 month old kept saying "WOW!" and "Yeah! Yeah! Yeah!" in anticipation of these easy baked nuggets. I've never met a kid who doesn't like chicken nuggets and my little guys are no exception.

These come together in under 30 minutes and win points because they make use of the leftover crumbs at the bottom of the chip bag (hold on to those sad, broken chips, they will be given new life!).  There's extra flavor from the honey mustard they're dipped in before baking (don't worry, those of you with picky eaters, it's not overpowering!) and the potato chip coating even makes them gluten-free (you could certainly substitute bread crumbs if you prefer)! 

And, if you were wondering, they were a huge hit--with little kids and big ones alike! 

Honey Mustard Baked Chicken Nuggets
serves about 4
1 pound boneless skinless chicken breasts, trimmed and cut into bite sized pieces
salt, pepper, and garlic powder (about 1/4-1/2 teaspoon each)
2 cups potato chip crumbs (use flavored to be really crazy!)
2 tablespoons mayonnaise
2 tablespoons yellow mustard
1 tablespoon honey
1 egg
cooking spray

Preheat oven to 350 degrees.  Line a baking sheet with foil and spray generously with cooking spray.  Season chicken with salt, pepper and garlic powder.  Place potato chip crumbs in a wide shallow dish (like a pie plate).  In another shallow dish, mix together mayonnaise, mustard and honey until well combined.  Beat in an egg and stir until smooth.
Dip cut pieces of chicken into honey mustard-egg mixture and then roll in potato chip crumbs.  Place in a single layer on the baking sheet.  Continue until all pieces of chicken are coated.  Bake at 350 degrees for 18-20 minutes or until chicken is cooked through and beginning to turn golden and crispy.  You can also raise the heat to 400 degrees for a few additional minutes for additional browning, if needed.  Serve with favorite dipping sauce or over salad.


Honey Mustard Dipping Sauce: (look familiar? : )
2 tablespoons mayonnaise
2 tablespoons yellow mustard
1 tablespoon honey
salt and pepper to taste
In a small bowl, mix together ingredients until well combined.  Taste and adjust seasonings and proportions as desired.  Dip away.

P.S. I'm linking this recipe to Laugh, Love & Craft's "Share the Wealth Wednesday."

Sunday, August 21, 2011

Peanut Butter Granola

Peanut Butter Granola with Chocolate Chips and Raisins
 We have been a little granola-obsessed in our house lately.  If I don't have a batch in the pantry handy for serving with yogurt or a splash of milk, I feel a little lost.  And, since I have a few others who are eagerly helping me work through containers of granola, I've been making it quite a bit these days.

Something fantastic about homemade granola is ingredients can be mixed and matched based on what's in your cupboard. Feel free to add or delete things from these recipes based on your mood and what's in stock. 

I wanted to try a peanut butter rendition this last time.  I really like how the peanut butter makes for bigger, "snackable" clusters.  It's been hard to resist picking them out of the jar and munching them one by one.  Not being a huge peanut fan, I don't know if this is my favorite batch, but definitely share-worthy.  And, as just about every time he's getting another scoop, my husband likes to remind me of what one of our latest house guests commented: "This granola is LEGIT!"

Also, check out the previous post on Mango Ginger Granola and below for a more traditional granola variation for other granola related ideas.  I am looking forward to experimenting in making my own granola bars next!

Peanut Butter Granola
3 cups rolled oats (the "Old Fashioned" kind)
1/2 cup wheat germ
1/4 cup sesame seeds
1/2 cup shredded coconut
1/2 cup honey or maple syrup or agave nectar
1 teaspoon vanilla
1/2 cup peanut butter
1/2 cup roasted peanuts, roughly chopped
1/2 cup chocolate chips (optional)
1/2 cup raisins (optional)

Preheat oven to 325 degrees.  Line a rimmed baking sheet with a piece of parchment.  In a large bowl, combine oats, wheat germ, sesame seeds and coconut.  Stir together honey, vanilla and peanut butter in a microwavable dish (a pyrex measuring cup is ideal).  Heat for about 30 seconds to soften peanut butter.  Stir together peanut butter mixture until smooth.  Pour over oats and mix together until all the oats are moistened.  Turn mixture out onto prepared baking sheet.  Spread into a single layer (mixture will be a bit clumpy and that's ok, it gives you lots of little clusters to snack on!).  Bake at 325 for 25-30 minutes, stirring every 5-10 minutes to prevent burning.  Granola is done when golden brown.  Remove from oven and allow to cool completely.  Stir in peanuts and chocolate chips and raisins (if using).  Transfer to an airtight container.

Traditional Granola Recipe with Raisins

Traditional Granola Variation:
Combine oats, wheat germ, sesame seeds and coconut as above.  Add 1/2 cup raw almonds (slivered, sliced or roughly chopped).
Omit peanut butter and substitute 1/4 cup vegetable oil.  Stir oil into honey (or maple syrup or agave nectar) along with 1 teaspoon ground cinnamon and 1 teaspoon vanilla extract.
Bake at 325 for 25-35 minutes, stirring every 5-10 minutes to prevent browning.
Remove from oven and allow to cool slightly.
Stir in 1/2 cup toasted sunflower seeds and 1 cup dried fruit (or combination) of your choice (raisins, chopped dates, apricots, dried cherries, cranberries, blueberries, mango...).
Store in an airtight container.

Tuesday, August 16, 2011

Banana Bran Muffins


I seem to always have at least a couple brown bananas hanging out in my fridge.  Perhaps you can relate.  Sometimes I take initiative and peel them, put them in baggies and freeze them so they're ready for smoothies.  Other times, they demand to be baked into something delicious.  This time, they're baked into something delicious and healthy! 

I like the individual portion size of a banana muffin (over bread where I'm prone to keep hacking away at the loaf until there's not much left).  These muffins are also more portable, which make for great grab-and-go breakfasts (especially split open and spread with peanut butter!).  And (as a wise sage from my mom's group taught me to do with banana bread), after baking, I brush the tops with melted butter and sprinkle with cinnamon and sugar to up the "treat-factor."  Sweet.
Banana Bran Muffins
  • 2 large eggs
  • 2/3 cup packed light brown sugar
  • 1 cup mashed ripe bananas, (2 medium)
  • 3/4 cup plain yogurt
  • 1/4 cup milk
  • 1 cup unprocessed wheat bran, (found in baking or health section, can substitute oat bran)
  • 1/4 cup canola oil
  • 1 teaspoon vanilla extract
  • 1 cup whole-wheat flour
  • 3/4 cup all-purpose flour
  • 1 1/2 teaspoons baking powder
  • 1/2 teaspoon baking soda
  • 1/2 teaspoon ground cinnamon
  • 1/4 teaspoon salt
  • 2 tablespoons melted butter
  • 2 tablespoons granulated sugar
  • 1 teaspoon ground cinnamon

Preparation

  1. Preheat oven to 400°F. Coat 12 muffin cups with cooking spray or distribute paper liners.
  2. Whisk eggs and brown sugar in a medium bowl until smooth. Whisk in bananas, yogurt, milk, wheat bran, oil and vanilla.
  3. Whisk whole-wheat flour, all-purpose flour, baking powder, baking soda, cinnamon and salt in a large bowl. Make a well in the dry ingredients; add the wet ingredients and stir with a rubber spatula until just combined. Scoop the batter into the prepared muffin cups (they’ll be quite full).
  4. Bake the muffins until the tops are golden brown and spring back when touched lightly, 15 to 25 minutes. Let cool in the pan for 5 minutes. Loosen edges and turn muffins out onto a wire rack to cool slightly before serving.
  5. Mix together granulated sugar and cinnamon in a small bowl.  Brush baked muffin tops with melted butter and top with cinnamon sugar, if desired. 
Source: Closely adapted from Eating Well's Banana-Bran Muffins

Sunday, August 14, 2011

Baked Pinto Beans, Enchilada Style

I was trying to think of cute or clever ways I could introduce this post, but I think I'm a bit distracted with some "Back to School Jitters."  For a few blissful years (since graduating beyond my schooling myself), I had been removed from such anxiety but tomorrow, I am beginning (to attempt) to homeschool my oldest who will be starting Kindergarten.  Wish me luck, say a little prayer and have patience (for anyone who might actually be reading) with me while I add another hat to my collection! : )
On the food front...


It is strongly likely that I sang the praises of Mark Bittman's recipes before this particular post.  In fact, I am remembering mentioning his cookbook, How to Cook Everything Vegetarian, in the Black Bean Burgers post.  Anyway, I am back at it.  I have gotten really excited over several of his recipes this week and wanted to share my take on his Baked Pinto Beans, Enchilada Style.

I don't think this recipe would have jumped out at me on its own, but I'm so glad I found it.  I was trying to use up leftovers and really stumbled upon recipe gold.  I would even serve this as party food--even though it's a bit humble, it was simple to prepare (can even be done ahead of time) and is fun to customize.  Serve it in tortillas topped with shredded cabbage, diced avocado, sour cream and hot sauce (as Mark Bittman says, "...in other words, the works!").


Baked Pinto Beans, Enchilada Style
2 tablespoons olive oil
2 cups favorite salsa or canned enchilada sauce (*See Note)
4 cups pinto beans (**See Note)
salt and pepper to taste
1 teaspoon garlic powder
1 cup Monterrey Jack cheese, cubed (or Cheddar or Colby Jack...)
1 cup crushed tortilla chips (great use for the broken ones left at the bottom of the bag)
1/2 cup crumbled Feta cheese (or Queso Fresco)
Fresh chopped cilantro for garnish
Tortillas (click on the link for a recipe for homemade ones, if you like!)
desired toppings: sour cream, hot sauce, shredded cabbage, diced avocado, etc.

Instructions: Preheat oven to 400 degrees F.  Grease a glass 9x13 baking dish with olive oil.  Spread salsa or enchilada sauce over bottom of dish.  Top with beans in an even layer.  Sprinkle with salt, pepper and garlic powder.  Spread cubes of cheese over bean layer, pressing them slightly down into the beans.  Cover with crushed tortilla chips and sprinkle the feta cheese over top.  Bake at 400 for 20-30 minutes or until mixture is bubbly and tortilla chips begin to brown.  Serve in warm tortillas with desired garnishes.

*Note on Salsa: I used a small can of green enchilada sauce and used jarred salsa to make up the rest
**Note on Beans: You can make your own from dried--it's very easy, really!  Here's a recipe or you can follow the instructions on the package.  Otherwise, use two 15 oz. cans, rinsed and drained.

Wednesday, August 10, 2011

Watermelon Granita

When it comes to fruit, I have to admit I'm a tad bit particular picky.  For me to want to eat it, fruit can not be overripe.  A speck of brown on a banana?  It's now in bread or smoothie territory.  I want my grapes to snap as I bite into them and my peaches to still be crisp.  Watermelon is no exception.  If it's getting the least bit squishy, I'm going to start avoiding it.

Conflicting with this snobbery (and perhaps redeeming it!), I loathe to waste food.  There must be some latent Depression-era mindset in me because I try my darndest to convert any scrap of leftovers into something edible.  Oftentimes (fortunately!), out of the sheer effort to not throw something away, a new and exciting dish emerges.  Enter this Watermelon Granita recipe.

This refreshing watermelon slush is a perfect use for some extra (and extra ripe) watermelon.  Aafter trying, you might even start buying watermelon specifically for this purpose!).  By the way, "Granita" is really just a fancy word for slushy.  There is no need for  any special equipment besides a blender or food processor (and a fork) and the hands on time is minimal.  What a delicious way to help  beat the heat that we've all been experiencing so much of these days!

Watermelon Granita
4 cups seedless watermelon, rind removed and cut into chunks
juice of 1 lime (about 2 tablespoons)
1/4 cup granulated sugar

In a blender or food processor, combine watermelon, lime juice and sugar.  Blend until smooth.  Pour liquid into a wide shallow pan (like a 9x13" glass baking dish or one of those extremely helpful reusable plastic storage containers).  It will look a bit foamy on the top.  Place pan in freezer (carefully so you're not cleaning up watermelon juice from your kitchen floor).  Allow to freeze for about an hour.  Remove and using a fork or the back of a spoon, scrape the sides where the mixture is beginning to freeze.  Return to the freezer and repeat every hour or so a couple more times until mixture is completely slushy and shaved (it's also ok to do all the scraping after the mixture is frozen--it's really not too much harder).  Cover with plastic wrap until ready to serve by spooning into glasses.

Adapted from Pioneer Woman's Watermelon Granita

Tuesday, August 9, 2011

Sausage Potato Brunch Casserole


Here's another recipe that I would imagine serving if I ran a bed and breakfast.  We have frequent overnight guests, so sometimes it does feel like a bed and breakfast around here!  This is a great one to serve to guests because you can whip it up the night before.  That means in the morning you get to spend more time in conversation around cups of coffee and not whipping yourself into a short-order-cook-syle-breakfast-making-frenzy.  It covers all the bases in one dish: eggs, meat, cheese, vegetables, potatoes...it'll really leaving you feeling satisfied.  Feel free to substitute diced ham for a more "Denver-omelet" style breakfast casserole. 

Sausage Potato Brunch Casserole
4 cups (about 16 oz) frozen diced potatoes ("Country Style Hash browns"), thawed
salt and pepper
1 teaspoon garlic powder
1 pound bulk ground breakfast sausage (or links, casings removed)
1 small onion, finely diced
1/2 green pepper, finely diced
1/4 red bell pepper, finely diced
1/2 cup white button mushrooms, thinly sliced
10 eggs
3/4 cup milk
2 teaspoons hot pepper sauce (i.e. Tobasco), optional
1 cup shredded cheddar cheese
salsa or ketchup for serving, optional

Grease a 9x13 baking dish with cooking spray.  Spread potatoes in an even layer across dish.  Sprinkle surface evenly with garlic powder and season with salt and pepper.  Set aside.

In a large skillet over medium high heat, brown sausage until cooked through.  Crumble and sprinkle evenly over potato layer.  In the same skillet, saute onion until softened, about 5 minutes.  Remove from skillet and set aside.

Return skillet to heat and saute peppers and mushrooms until softened, about 5 minutes.  Add pepper-mushroom mixture to onions, stir together and spread evenly over sausage and potatoes.  Layer 1/2 cup shredded cheese over top.

In a large bowl, whisk together eggs until well combined.  Stir in milk, hot pepper sauce and additional salt and pepper.  Pour egg mixture over top of casserole.  Top with remaining shredded cheese.  At this point, casserole can be covered and refrigerated overnight.

When time to bake, remove from fridge for about 15 minutes.  Bake at 350 degrees for about 1 hour or until eggs are set, cheese is melted and a knife inserted in the middle comes out clean.  Remove from oven and allow to sit for 10-15 minutes before slicing and serving.

Adapted from: Easy Breakfast Casserole Recipe with Sausage and Potatoes

Thursday, August 4, 2011

Favorites From the Archives...

Green Bean Salad with Fresh Tomato Vinaigrette and Feta

Since I've now been blogging for over a year, I've found it's been really fun to go back and see the recipes that I posted last summer.  Since the same ingredients are back in season, I am reminded of some of my late-summer favorites.  As I've been remaking them and still feeling the same excitement over these dishes that I felt when I originally posted them, I thought I'd pull them out of the archives and share them with you. 

 Pineapple Zucchini Cake with Cream Cheese Frosting.
I have a lot of recipes that use zucchini but I think this one still has to be my all-time favorite.  It's made with whole wheat flour, has vegetables (alright, technically zucchini is a fruit but "vegetable" sounds healthier) and low fat, so it's a relatively guilt-free treat!


Crunchy Kale Salad 
As my brother-in-law says, I HATE kale but I LOVE this salad.  Kale is a serious power-food and I can't think of a more delicious use for it.  The only drawback for us is that Jay and I have been having adverse reactions to pine nuts lately so I'll have to come up with a substitute (thinking walnuts or pepitas).  Has anyone else experienced the phenomenon known as "Pine Mouth?"  I'll have to blog more about it sometime, but please let me know if you, too, have experienced a lingering bitter taste after eating pine nuts. 


Green Bean Salad with Fresh Tomato Vinaigrette and Feta
I have all the ingredients to make this one right in my fridge and can't wait to have it again.  It's visually gorgeous, fresh and the combination of flavors is addictive. 


Sushi Roll Salad
You may be noticing a trend that the majority of these links are to salad recipes.  What can I say?  It's hot.  This one is a great way to highlight fresh from the garden cucumbers.  If you like California rolls, you'll love this salad.

Pico de Gallo 
I keep waiting for fresh tomatoes to show up in our little local farm market.  I know they're going to show up any day now and when they do, I'll be so excited to make up some incredible pico de gallo.  The good news is this still tastes great even made with grocery store Roma tomatoes in January.


Summer Fruit Cobbler Bars:
Peaches, raspberries and blueberries sandwiches between layers of brown sugar oatmeal crumble.  Yes, please.  Take advantage of in-season fruits with this dessert.

Tuesday, August 2, 2011

Skillet Shrimp Fajitas


Add this recipe to your file of "Desperation Dinners." Already after 5 o'clock and I hadn't really even thought about what to make for dinner.  To make matters worse, it had been awhile since I'd been to the store and all we were left with were odds and ends---half a pepper, a lonely zucchini, some sliced onion left from salads over the weekend.  What to do...Immediately, my mind went to fajitas.  Shrimp fajitas, since all my meat was frozen and shrimp would thaw out and cook up the fastest.

The shrimp thawed out under running water in a matter of minutes while I chopped the remaining vegetables and then quickly sauteed everything in batches.  In under 30, we were sitting down to a meal that definitely had the look of being more planned than it was.  My five year old asked if we could have this for dinner again sometime soon.  I'll count that as a success.

Oh, and a quick note: we were all out of the shredded cheese that I would normally top Mexican fare with in our house.  Taking a cue from Susie Jimenez (contestant on the current season of "The Next Food Network Star"), I substituted crumbled feta.  If you are able, I highly recommend using it on the fajitas.  It added a surprising and really delicious twist that I will be repeating in the future.

 Shrimp Fajitas
1 pound medium-large shrimp, thawed, peeled and de-veined
1 teaspoon ground cumin
1 teaspoon chili powder
1 teaspoon kosher salt
1 teaspoon garlic powder
1/4-1/2 teaspoon cayenne pepper

1 medium onion, thinly sliced
1 green pepper, thinly sliced
1/2 red, yellow or orange bell pepper, thinly sliced
1 medium zucchini, thinly sliced
2-3 tablespoons vegetable oil

8 six-inch flour tortillas
toppings: salsa, sour cream, diced avocado, crumbled feta cheese

In a small bowl, combine cumin, chili powder, salt, garlic powder and cayenne pepper.  Stir well and set aside.  Remove shells and tails from shrimp and place in a bowl or in a single layer on a plate.  Sprinkle shrimp with a generous layer of spice mixture.


In a large skillet over medium-high heat, saute vegetables in batches with a couple teaspoons of oil for each batch until vegetables are crisp-tender and begin to brown.  Remove to a bowl and keep warm.  Repeat until all vegetables are cooked.  Wipe out pan.  Add remaining oil and saute shrimp just 1-2 minutes per side, flipping once.  Shrimp are done as soon as they become firm and pink.  Immediately remove from the heat.

To serve, divide shrimp and vegetables evenly among tortillas.  Dress with desired condiments such as salsa, diced avocado or guacamole, sour cream and cheese

Monday, August 1, 2011

A Window into My Open Fridge

Poor, vulnerable fridge in all it's open glory...
This is a long time in coming (what can I say, I am technically challenged), but you can now access my blog by just typing in http:myopenfridge.com!  So simple, so sleek and modern! Myopenfridge.blogspot.com works too, however.  Of course, you could also skip that typing all together and just become follower of the blog too... ; )

In honor of my new domain name,

Here are a few fun facts about my (real) Open Fridge:
These are some real heart-bearing revelations.  Please, no judging here.

*My fridge is almost always obscenely messy.  It's rarely well organized and usually there's some combination of  something sticky and crumbs on the shelves.

*Currently, there is an entire tub of plain yogurt that is waiting to be returned back to the grocery store because when I opened it, it had green, fuzzy mold growing on the top.  Yuck.  Have you ever returned a food item?  I have not and working up the courage, but really don't want to eat the cost of furry yogurt.

*I own more condiments than anyone I know and they are always jocky-ing for space in the various cubbies on the door.  There's also a little collection of tiny packets from fast food restaurants trying to take over.  Please tell me, does anyone have any bright ideas for those?

Occasionally I use a couple here and there--for instance if I'm playing "restaurant" with the boys for lunchtime or just plumb run out of Heinz in the big bottle (always, always Heinz Ketchup--not usually so brand particular, but in our house we always use Heinz Ketchup and Kraft Macaroni and Cheese <--that one the little boys and I are not quite so picky on but the Man of the House has put his foot down regarding generic macaroni and cheese).

*Hanging out on the door (trying to avoid the tangle of aforementioned condiments), there is one lonely can of Cream Soda that my five year old has finally given up asking when we can make "Cream Soda Bread" (like beer bread, but with cream soda--not that I have anything against authentic beer bread, we just usually don't have it in the house) not so much because he wants Cream Soda Bread but because he wants to drain the leftover soda that is now probably way expired (does soda actually expire?).

* We always have an insane number of eggs in our fridge.  I believe the current count is 22.  For some reason, I get a little bit panicky if we get anywhere close to low on eggs. 

*I like having a one year old in the house because whole milk tastes much better in coffee than skim.  In fact, I have decided that half and half tastes even better than whole milk and have forgone sweetener in favor of richer dairy.  Milk is another thing we just don't run out on. 

* On the top shelf, there are green onions hanging out in a cup of water.  I swear it makes them last longer.  I also swear I manage to knock that cup of water over at least once a week. 

* Also on the top shelf is a bunch of very brown bananas.  I'm working up the motivation to make some banana muffins with them.  Maybe tomorrow...

What are your fridge staples?

Recipes (God willing) coming this week:
Shrimp Fajitas
Cranberry Almond Wild Rice Salad
Revisiting some of my summer favorites
Something with brown bananas...
Sausage Potato Brunch Casserole
Juicy Lucy Hamburgers (but I am embarrassed of the terrible photos, so I don't know...)

Let me know if something piques your interest or if you have any other requests!