Showing posts with label quick. Show all posts

Tuesday, August 30, 2011

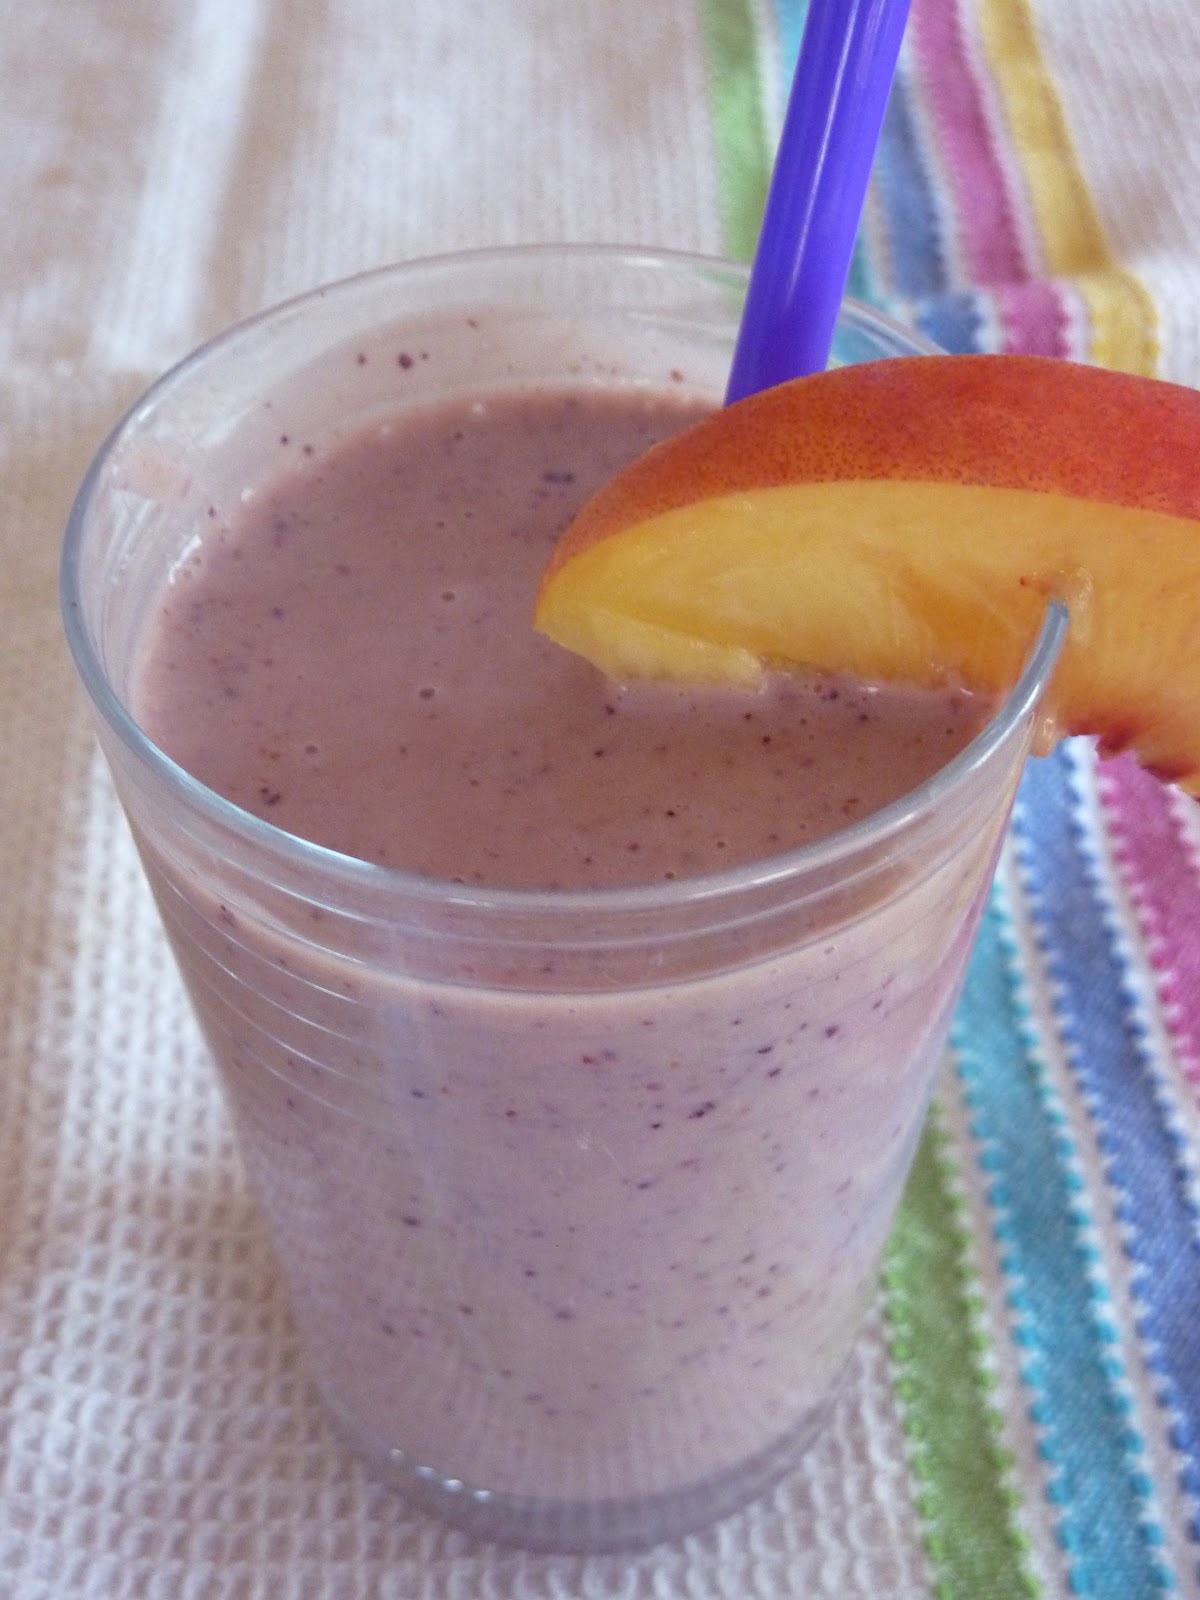
Peach Banana-Berry Smoothies

Silas, my five year old, has just discovered his first loose tooth.  Loose teeth really give me the shivers. They are just plain creepy.  He is constantly wanting to show me its wiggly progress which makes me cringe.  His loose tooth has given him a bit of trouble when eating.  As the nice mother I am, I made these smoothies to give him an easy to eat breakfast (although maybe to expedite the loose tooth falling out process, perhaps I should be serving him whole apples to bite into...).

This recipe is obviously just a starting point.  Smoothies are a great opportunity to use just about any combination of fruits (and vegetables!) you have available.  Feel free to mix, match and customize!  I've gotten used to throwing in a handful of fresh spinach leaves and a spoonful of ground flax seeds to sneak in even more nutrition.  Those little extras are completely optional, but I can assure you that they blend right up and don't affect the flavor a bit.

Also, as I've been highlighting quick, weekday breakfasts, a smoothie recipe definitely needs to be included! 
Peach Banana-Berry Smoothies
makes about 3 cups
1 banana, peeled, frozen and broken into chunks
1 cup frozen blueberries
2 whole peaches or nectarines, pit removed and cut into chunks
1 cup plain yogurt
1 tablespoon ground flax seeds (optional)
1 handful fresh spinach leaves, washed and dried (optional)
milk or fruit juice as needed

In the pitcher of a blender, place in order: yogurt, peaches, blueberries, banana chunks, spinach and flax seeds (basically, you want the more juicy kinds of fruit and any liquid on the bottom.  Blend on high speed, stopping and scraping down any stubborn pieces of fruit as needed, until smooth.  If mixture is especially thick, you can add a splash of milk or juice.  If it is too thin, a few ice cubes can help. Pour into glasses and enjoy, drinking through straws preferable. 

Note: I like to put any fruit that is starting to get close to past its prime into smoothies.  If I'm not going to use it right away, it's great to freeze it in chunks and have it ready to throw into the blender at a moment's notice.  Once bananas are overripe, I will peel them, place them in baggies and throw them in the freezer. 

Also, lots of surprising fruits are great in smoothies---try whole grapes, chunks of cantaloupe or honeydew, kiwi, peeled oranges, pineapple, kiwis, mango...I know a friend who always throws a few baby carrots into hers and another friend who puts raw beets into her smoothies (I hear they make it a lovely pink color, but I've yet to try). 

Tuesday, August 23, 2011

Senegalese Style Peanut Stew


We had some friends we hadn't seen in a long time over for an impromptu lunch last week.  The ingredients I had on hand were for a dish I was wanting to make from my favorite vegetarian cookbook ("How to Cook Everything Vegetarian" by Mark Bittman).  A Senegalese-style (as in the African country of Senegal, where peanuts are a primary crop and sweet potatoes are also featured prominently--thank you, Wikipedia!) peanut stew (and a vegetarian one at that!) was not what I would have planned on serving company (why couldn't I have had some nice deli turkey in the fridge???). 

Anyway, our friends arrived and when they found out what I was making exclaimed, "You don't have to make something vegetarian just for us!"  Turns out, they've started eating primarily vegetarian and it was a very nice coincidence.  Over some very sweet catching up with our friends, we became such fans of this hearty, complex stew that I made it again this week (plus I needed to make sure to get a picture!). 

Serve it with a scoop of hot cooked rice or couscous to round it into a very satisfying meal. Here it's pictured with cooked millet which is a small, round grain found in African cuisine.  I found it at my local health food store, but familiar white rice was great with it.  It's so good, you'll be fighting over who gets to take the leftovers for lunch the next day!

Senegalese Style Peanut Stew
3/4 cup shelled, roasted peanuts, roughly chopped
2 tablespoons vegetable or peanut oil
1 tablespoon peeled and minced fresh ginger
1 tablespoon minced garlic
1 medium red onion, halved and thinly sliced
1/2 red bell pepper, diced
pinch of cayenne pepper, more or less to taste
salt and freshly ground black pepper
6 cups chicken or vegetable stock
2 (about 1 pound) sweet potatoes, peeled and cut into large chunks
1 15 ounce can diced tomatoes, with juice
1/4 cup peanut butter
1 bunch kale or collard greens, washed thoroughly and cut into wide ribbons
juice of half a lime
1/4 cup chopped cilantro

Heat oil over medium-high heat in a large pot.  Once hot, saute onion, bell pepper, ginger and garlic stirring occasionally until softened--about 3-5 minutes.  Add 1/2 cup of the peanuts, cayenne pepper and salt and pepper. 

Stir in the stock, sweet potatoes and can of tomatoes.  Bring to a boil, turn the heat down to medium-low and simmer, partially covered, stirring occasionally until the potatoes are tender, about 10-15 minutes.

Stir in the peanut butter and kale.  Cook just until the greens are tender--3-5 minutes.  Stir in lime juice and cilantro.  Taste and adjust seasoning and serve, garnished with the remaining peanuts and cilantro.  
Recipe Adapted from "How to Cook Everything Vegetarian" by Mark Bittman

Tuesday, August 16, 2011

Banana Bran Muffins


I seem to always have at least a couple brown bananas hanging out in my fridge.  Perhaps you can relate.  Sometimes I take initiative and peel them, put them in baggies and freeze them so they're ready for smoothies.  Other times, they demand to be baked into something delicious.  This time, they're baked into something delicious and healthy! 

I like the individual portion size of a banana muffin (over bread where I'm prone to keep hacking away at the loaf until there's not much left).  These muffins are also more portable, which make for great grab-and-go breakfasts (especially split open and spread with peanut butter!).  And (as a wise sage from my mom's group taught me to do with banana bread), after baking, I brush the tops with melted butter and sprinkle with cinnamon and sugar to up the "treat-factor."  Sweet.
Banana Bran Muffins
  • 2 large eggs
  • 2/3 cup packed light brown sugar
  • 1 cup mashed ripe bananas, (2 medium)
  • 3/4 cup plain yogurt
  • 1/4 cup milk
  • 1 cup unprocessed wheat bran, (found in baking or health section, can substitute oat bran)
  • 1/4 cup canola oil
  • 1 teaspoon vanilla extract
  • 1 cup whole-wheat flour
  • 3/4 cup all-purpose flour
  • 1 1/2 teaspoons baking powder
  • 1/2 teaspoon baking soda
  • 1/2 teaspoon ground cinnamon
  • 1/4 teaspoon salt
  • 2 tablespoons melted butter
  • 2 tablespoons granulated sugar
  • 1 teaspoon ground cinnamon

Preparation

  1. Preheat oven to 400°F. Coat 12 muffin cups with cooking spray or distribute paper liners.
  2. Whisk eggs and brown sugar in a medium bowl until smooth. Whisk in bananas, yogurt, milk, wheat bran, oil and vanilla.
  3. Whisk whole-wheat flour, all-purpose flour, baking powder, baking soda, cinnamon and salt in a large bowl. Make a well in the dry ingredients; add the wet ingredients and stir with a rubber spatula until just combined. Scoop the batter into the prepared muffin cups (they’ll be quite full).
  4. Bake the muffins until the tops are golden brown and spring back when touched lightly, 15 to 25 minutes. Let cool in the pan for 5 minutes. Loosen edges and turn muffins out onto a wire rack to cool slightly before serving.
  5. Mix together granulated sugar and cinnamon in a small bowl.  Brush baked muffin tops with melted butter and top with cinnamon sugar, if desired. 
Source: Closely adapted from Eating Well's Banana-Bran Muffins

Tuesday, August 2, 2011

Skillet Shrimp Fajitas


Add this recipe to your file of "Desperation Dinners." Already after 5 o'clock and I hadn't really even thought about what to make for dinner.  To make matters worse, it had been awhile since I'd been to the store and all we were left with were odds and ends---half a pepper, a lonely zucchini, some sliced onion left from salads over the weekend.  What to do...Immediately, my mind went to fajitas.  Shrimp fajitas, since all my meat was frozen and shrimp would thaw out and cook up the fastest.

The shrimp thawed out under running water in a matter of minutes while I chopped the remaining vegetables and then quickly sauteed everything in batches.  In under 30, we were sitting down to a meal that definitely had the look of being more planned than it was.  My five year old asked if we could have this for dinner again sometime soon.  I'll count that as a success.

Oh, and a quick note: we were all out of the shredded cheese that I would normally top Mexican fare with in our house.  Taking a cue from Susie Jimenez (contestant on the current season of "The Next Food Network Star"), I substituted crumbled feta.  If you are able, I highly recommend using it on the fajitas.  It added a surprising and really delicious twist that I will be repeating in the future.

 Shrimp Fajitas
1 pound medium-large shrimp, thawed, peeled and de-veined
1 teaspoon ground cumin
1 teaspoon chili powder
1 teaspoon kosher salt
1 teaspoon garlic powder
1/4-1/2 teaspoon cayenne pepper

1 medium onion, thinly sliced
1 green pepper, thinly sliced
1/2 red, yellow or orange bell pepper, thinly sliced
1 medium zucchini, thinly sliced
2-3 tablespoons vegetable oil

8 six-inch flour tortillas
toppings: salsa, sour cream, diced avocado, crumbled feta cheese

In a small bowl, combine cumin, chili powder, salt, garlic powder and cayenne pepper.  Stir well and set aside.  Remove shells and tails from shrimp and place in a bowl or in a single layer on a plate.  Sprinkle shrimp with a generous layer of spice mixture.


In a large skillet over medium-high heat, saute vegetables in batches with a couple teaspoons of oil for each batch until vegetables are crisp-tender and begin to brown.  Remove to a bowl and keep warm.  Repeat until all vegetables are cooked.  Wipe out pan.  Add remaining oil and saute shrimp just 1-2 minutes per side, flipping once.  Shrimp are done as soon as they become firm and pink.  Immediately remove from the heat.

To serve, divide shrimp and vegetables evenly among tortillas.  Dress with desired condiments such as salsa, diced avocado or guacamole, sour cream and cheese

Thursday, July 28, 2011

Cherry Rhubarb Crisp

In case you haven't noticed, I have just the tiniest bit of a sweet tooth (no kidding).  It's terrible and a habit I wish I could break (not really, I am afraid).  It was especially bad during my pregnancies--I believe I still have a few of the Milky Ways I enjoyed during that time plastered to my middle.  Although it's abated somewhat, I still have to end the evening with something just a tiny bit sweet.  I'm not picky, it doesn't even have to be extravagant. 

A crisp is one of the simplest desserts around and it goes together extremely quickly.  Despite its rather humble place in the dessert world, I don't think you can go wrong with a sweet fruit filling topped with buttery, brown-sugar crumble.  Since we've had an abundance of fresh fruit in the house, I decided a crisp was in order. 

It can be varied in the topping and filling based on what you have on hand.  I was feeling nostalgic about my Grandma Lois' Cherry Rhubarb Jam (I'll have to get my hands on and share that recipe) and thought I'd give that Cherry Rhubarb combination a spin.  Feel free to substitute another fruit: blueberries, peaches, blackberries, apples, you get the idea...

Cherry Rhubarb Crisp
3 cups pitted cherries
3 cups rhubarb, trimmed and sliced (frozen is fine)
1/4 cup brown sugar, packed
1 tablespoon all purpose flour
1 tablespoon fresh lemon juice
1/2 teaspoon almond or vanilla extract, optional
2/3 cup all purpose flour
1/2 cup packed brown sugar
1/2 cup regular oats
3/4 teaspoon ground cinnamon
1/4 teaspoon ground nutmeg
pinch of salt
4 1/2 tablespoons chilled butter or stick margarine, cut into small pieces
whipped cream, vanilla ice cream or frozen yogurt for serving (we did a splash of half and half because that was what was in the house at the time)

Directions:
Preheat oven to 375 degrees F.  Spray a medium sized baking dish (11x7 or 8x8-inch recommended) with cooking spray.
Add fruit, 1/4 cup brown sugar, 1 tablespoon flour, lemon juice and almond extract in baking dish and stir to combine. 
In a medium bowl, stir together flour, 1/2 cup brown sugar, oats, cinnamon, nutmeg and salt.  Cut in butter with a pastry blender or two knives until the mixture becomes like coarse meal.  Sprinkle over the fruit mixture. 
Bake at 375 for 30 minutes or until bubbly and beginning to turn golden on top. 
Top each serving with whipped cream or ice cream. 

Recipe adapted from: The Best of Cooking Light, Blueberry Crisp a la Mode
Note:  This is a very basic crisp recipe.  You can add other things to make it more personal:
I have been known to use whatever odd bits of granola (or crumbled up granola bars), the mangled gingersnaps at the bottom of the bag, lonely graham cracker pieces, chopped nuts etc. I have lying around to make a crisp--just stir those extra bits in with the flour and oats (or in place of the oats) before adding the butter (using more butter if necessary).

Monday, July 25, 2011

Ricotta Gnocchi in Sage Brown Butter


Last Wednesday was one of those extra-crazy, hectic evenings.  Mealtime rolled around and there was nothing even remotely ready to sit down for.  Quick! Feed the kids whatever randomness you can gather from the fridge!  Never mind that it doesn't entirely cover all the food groups and your five-year-old goes to bed wailing that he didn't get to eat "real dinner."  Jay and I agreed that I would put together something for us once the little darlings were tucked away for the night.

Once the kids were in bed, I set to work on a dish I had been wanting to try for awhile.  It made use of the remaining container of ricotta cheese I had used to make Summer Lasagna the week before and some fresh sage leaves I actually happen to be (trying) to grow this year.  I put on a pot of water to boil, browned some butter and within a short time, we were settled on the couch in front of the tv together with our respective pasta dishes (what a treat nowadays since having kids--the whole eating in front of the t.v.--for our family, that is).  Traditionally, "gnocchi" are little dumplings made from potatoes and flour and served with pesto or pasta sauce.  That said, gnocchi (which translates literally into "lumps") can actually be made from many ingredients.  These Ricotta Gnocchi were incredibly simple to make and are creamy and light, Italian comfort food.  I served them with sage brown butter, as recommended by Mark Bittman, the recipe's author.  You don't have to wait for a night when the kids are already in bed to make them (I would think they would be kid friendly--especially if they got to help), but I don't blame you if you do. 

Ricotta Gnocchi
1 15 ounce container ricotta cheese (preferably whole milk)
1 1/4 cups shredded Parmesan cheese (this is a time where freshly shredded improves things greatly)
2 eggs, beaten
freshly ground black pepper
salt
3/4-1 cup all-purpose flour
3 tablespoons unsalted butter
8-10 fresh sage leaves

Bring a large pot of water to boil.  In the meantime, in a medium bowl, stir together ricotta cheese and Parmesan.  Mix in eggs and stir until well combined.  Add salt and pepper to taste.  Add in 1/2 cup flour, adding more until mixture comes together in a very sticky dough.  Put one spoonful of dough into the boiling water.  If the dough holds its shape while it boils, the dough is ready, if not, add more flour.

Put the butter in a large skillet and melt it over medium heat.  Continue to cook butter until it becomes a nutty brown color.  Add the sage leaves and fry in the butter until crispy looking (just a minute or so).  Turn heat to low and just keep warm.

Place spoonfuls of the dough (working in batches of about six at a time) into the boiling water.  When gnocchi rise to the surface, remove from water with a slotted spoon and add to the skillet with the sage butter.  Continue to boil gnocchi and transfer to skillet until dough is used up.  Once all the gnocchi are in the skillet, toss with the sage brown butter, taste and adjust seasoning as needed and serve immediately.
Serves 4

Source: Ricotta Cheese Gnocchi by Mark Bittman

Tuesday, July 19, 2011

Summer Lasagna and Menu


Happy Birthday, Open Fridge!  Today marks the One Year Anniversary of my first post.  My goodness, how time flies.  I feel like I've learned a lot in the last year and hope that some of those smarts have been passed on--at the very least, a bit of my photography has improved!  I've really enjoyed keeping record of things that have come out of my kitchen and have been so touched and humbled by your kind and encouraging feedback.  Thank you. Thank you. 

Today's recipe is a reminder of how much I love this time of year.  It never ceases to make me happy thinking of (and using!) the abundance of produce available in the summer. Confession, here's how much of a weirdo I am: it's only July, and I am already shuddering to think of every day bringing us closer to day light savings time...seriously, Lauren, stop and just enjoy the moment, will you?  This delicate lasagna is rife with the flavors of summer--fresh tomatoes, zucchini, basil and just the thing to bring me back to reality that I can currently enjoy abundant sunshine and freshly-picked vegetables that have not trotted the globe.  Make it as a main dish or as a starring player in the menu suggested below and then go outside and enjoy those balmy evenings (hopefully, more mosquito-free than we seem to be experiencing these days!)!


Menu:
Summer Lasagna
Grilled Italian Sausages (I used Chicken Basil flavored and they were yummy!)
Green Salad with Easy Balsamic Vinaigrette (try it with Toasted Walnut Oil!)
and Homemade Croutons
Angel Food Cake with Strawberries and Whipped Cream (or peach cobbler would be fantastic right now)


Summer Lasagna
1 1/2 cups ricotta cheese
3/4 cup shredded Parmesan cheese, divided
1/4 cup basil pesto
salt and pepper to taste
9 lasagna noodles, cooked "al dente" to package directions
3-4 tablespoons olive oil, divided
2 small zucchini
1 small yellow (crookneck or zucchini) squash
4 garlic cloves, minced and divided
1-2 pints grape tomatoes, halved

fresh torn basil leaves for garnish

Cook lasagna noodles according to package directions.  Drain and set aside. 
While noodles are cooking, make ricotta mixture.  In a small bowl, stir together ricotta cheese, 1/2 cup of Parmesan cheese and pesto.  Season to taste with salt and pepper, set aside.  
Thinly slice zucchini and yellow squash.  Place 1/3 of minced garlic and 1 tablespoon olive oil in a large saute pan.  Over medium high heat, stir frequently until garlic is fragrant, about 30 seconds to 1 minute.  Add half of zucchini and squash slices, season with salt and pepper and saute just until tender, 3-5 minutes.  Remove from pan, place in small bowl and repeat with remaining half of squash slices.  After zucchini has been sauteed, add remaining garlic, olive oil and tomatoes to pan.  Cook over medium high heat, stirring frequently, until tomatoes begin to break down.  Remove from heat and set aside.

To assemble: Spray a 9x13 baking dish with cooking spray.  Lay down 3 lasagna noodles.  Top with a layer of zucchini (using about 1/3).  Spread a layer of half of the ricotta mixture over top (you can also just place small dollops evenly over surface).  Top with a layer of tomato mixture (about 1/3 of the tomatoes).  Repeat with a second layer.  Top with lasagna noodles, remaining zucchini and tomatoes.  Sprinkle with reserved 1/4 cup Parmesan cheese and bake, just until heated through--20-30 minutes.  Garnish with fresh basil leaves, slice into pieces and serve.

Variation: The original recipe does not bake the lasagna.  Each noodle is cut into thirds and the lasagna is assembled on each individual plate.  This makes for a gorgeous presentation and will avoid heating up your kitchen from turning on the oven.  The lasagna will be served much closer to room temperature (which is still a delicious thing!).

Adapted from: Martha Stewarts' No Bake Summer Lasagna 

Monday, July 18, 2011

Easy Chicken Tacos


Since getting rid of our cable last Fall, I have discovered the hidden gem that is PBS.  One of my favorite shows is "From America's Test Kitchen: Cook's Country."  It is totally cheesy, but is extremely informative and the cooking demonstrations always leave me feeling hungry and excited about trying a new recipe.  This recipe for Chicken Tacos is one of those that piqued my interest.  I never would've thought to combine the ingredients called for, but it makes for an extremely easy, flavorful taco filling.  Make some extra to put into quesadillas and burritos for the rest of the week as well!

Also, for fun, I included a sample menu of what I served with the chicken tacos.  Hope you find it useful!

Fiesta Menu: 
Easy Chicken Tacos and suggested toppings
Tortilla chips with pico de gallo and packaged queso dip (Velveeta and a can of Rotel is still my fav)
Spanish Rice
Canned Refried Beans heated and topped with shredded cheese
Cantaloupe slices with lime zest, honey and lime juice drizzled over top
Tropical Shortcakes: yellow cake topped with chopped pineapple, mango, kiwi and berries, pastry cream and whipped cream

Easy Chicken Tacos:
3 tablespoons butter
4 cloves garlic, minced
2 teaspoons chipotle peppers in adobo sauce, minced (look for these in the Latin foods section)
1/2 cup orange juice
1 tablespoon Worcestershire sauce
3/4 cup fresh cilantro, chopped and divided
1 1/2 pounds boneless, skinless chicken breasts or tenders
1 teaspoon yellow mustard
salt and pepper to taste
12, 6-inch flour tortillas

For serving: grated cheese, shredded lettuce, chopped tomato or pico de gallo, diced avocado, sour cream

Directions: Melt butter in large skillet over medium high heat.  Add garlic and chipotle peppers and cook until fragrant, about 30 seconds.  Stir in orange juice, Worcestershire sauce and 1/2 cup cilantro.  Bring to a boil.

Add chicken and simmer, covered, over medium-low heat until chicken is cooked through and registers 160 degrees, about 10-15 minutes, flipping chicken half-way through cooking.*  Remove chicken from sauce mixture, transfer to a plate and set side, tenting with foil.

Increase heat to medium-high and cook until sauce is reduced to about 1/4 cup, about 5 minutes.  Remove from heat and whisk in mustard.  Using 2 forks, shred chicken into bite-sized pieces (and removing any "icky bits" as necessary).  Return chicken to skillet.  Toss with remaining cilantro and toss until well-combined.  Season with salt and pepper to taste.  Serve in tortillas with desired toppings.

*Crock Pot Variation: Follow above direction through bringing the sauce mixture to a boil.  Place raw chicken breasts in a crock pot, pour sauce mixture over chicken and cover.  Cook on high for 4-5 hours or until chicken is cooked through and shreds easily with a fork.  Remove chicken to a plate.  Pour sauce mixture back into skillet and reduce as directed above.  Shred chicken, toss with sauce mixture and serve or return to crock pot to keep warm until ready to serve.  Stir in fresh cilantro right before serving.    

Source: Easy Chicken Tacos from America's Test Kitchen, Cook's Country TV

Sunday, July 17, 2011

S'Mores Bars


Last weekend, we got to attend my husband's Family Reunion in Southern California.  It was a really wonderful time, and as part of the gathering, we got to have a beach bonfire (Huntington Beach, Surf City USA, baby!).  No bonfire is complete without S'mores, and I can't think of a better way to enjoy them than against the backdrop of the roaring Pacific and a setting sun, but this recipe is a close second.

Although these are indoor s'mores, you won't feel like you're settling (and you won't go to bed smelling like a campfire).  Jay, my husband, who doesn't even like traditional s'mores can't keep his hands off of them.  Personally, I think the addition of the butter and brown sugar and a dusting of sea salt takes these to a whole 'nother level...


S'Mores Bars
12 (5x2 1/2 inch) Graham Crackers
3/4 cup (1 1/2 sticks) butter
3/4 cup firmly packed brown sugar
3 miniature marshmallows
1 cup chocolate pieces (about 4 chocolate bars, broken into pieces or milk chocolate chips)
sea salt for sprinkling, optional

Heat oven to 350 degrees.  Line 15x10x1inch jelly roll (or cookie sheet with edges) with aluminum foil leaving a 1-inch overhang on ends.  Spray foil with cooking spray.  Place graham crackers onto foil so sides touch.

Melt butter and brown sugar in medium saucepan over Medium heat, stirring constantly, until smooth and mixture just comes to a boil, abotu 5 minutes.  Pour evenly over crackers.

Bake 5-6 minutes or until bubbly.
Remove pan from oven; sprinkle with marshmallows and chocolate pieces.  Continue baking until marshmallows begin to soften, about 2 to 3 minutes.  Sprinkle with a fine dusting of sea salt, if desired.  Cool completely.  Lift from pan using foil.  Cut into bars.

Source: Back of Market Pantry (Target) Brand Honey Graham Crackers

Monday, July 4, 2011

Cherry Pineapple Dump Cake


 Happy 4th of July!  I hope everyone had a lovely day.  Even though the day has passed, I thought I would share a quintessential pot luck dessert.  A few processed ingredients "dumped" (hence the name) together never tasted so good.  You can have all of the ingredients on hand and throw it together at the last minute.  There are all sorts of variations out there--feel free to substitute another fruit for the cherry pie filling and I included the option of adding pecans and coconut, although I am a purist and leave them out.  Keep the ingredients on hand for when you need to throw together a quick dessert!  


Cherry Pineapple Dump Cake
1 can (21 ounce) cherry pie filling
1 can (15 ounce) crushed pineapple in juice
1 box yellow cake mix
1 stick (8 tablespoons butter)
1/4 cup water
1/2 cup chopped pecans (optional)
1/2 cup shredded coconut (optional)
vanilla ice cream, whipped cream or Cool Whip for serving

Preheat oven to 350 degrees.  Spray a 9x13 baking dish with cooking spray.  Pour cherry pie filling in bottom of baking dish.  Spread out evenly.  Drain juice from pineapple and set aside.  Spread crushed pineapple over top of pie filling.  Sprinkle dry cake mix evenly over fruit mixture.  Melt butter and combine with reserved pineapple juice.  Stir in water and pour liquid over top of cake mix.  Do not stir.  If desired, sprinkle with pecans and coconut.  Bake at 350 degrees for 35-40 minutes or until golden brown.  Serve warm or at room temperature with a scoop of vanilla ice cream or a dollop of whipped cream or Cool Whip. 

Recipe Adapted from "The Cake Mix Doctor" by Anne Byrn

Monday, June 20, 2011

Chicken Cordon Bleu Grilled Sandwich

It's been a light cooking week.  Things have been busy and we were out of town with more travel on the horizon which has meant a rather empty fridge.  Usually when we're busy or just get home from a trip, one of our "go-to's" is a rotisserie chicken.  It's a great convenience food.  I don't think it's going to be long before my hungry boys will be able to polish off one of those in one sitting, but for now, we usually have at least a small bit leftover.  This sandwich ended up being a great use for the leftovers.  Crispy outside, creamy melted Swiss on the inside paired with tangy homemade honey mustard and salty ham and chicken, it was a great quick lunch.  I have quite a few uses for leftover rotisserie chicken, but this one will definitely be remembered. 
   
Chicken Cordon Bleu Grilled Sandwich 
Per Sandwich:
1 English muffin (or bread, hard roll or croissant)
about 2 ounces (about 1/4 cup) shredded cooked rotisserie chicken
2 slices deli ham
1 slice (about 1 ounce) Swiss cheese
1 tablespoon brown or Dijon mustard
2 teaspoons honey
2 teaspoons butter

In a small bowl, stir together mustard and honey.  Spread on inside of English muffin.  Layer chicken, ham and cheese.  Squish both sides of sandwich together.  Melt butter in a skillet over medium heat.  Cook sandwich in skillet, pressing down with a spatula until browned on each side and cheese is melted (about 2-3 minutes on each side).

Wednesday, June 1, 2011

Double Chocolate Oatmeal Cookies


This is a nostalgic recipe.  My mom would make this cookie a lot while we were growing up.  It's one of those recipes that we were always bound to have the ingredients on hand.  She'd throw a batch together by memory as we were getting ready for school and the first tray would be out of the oven and into our lunch boxes before we ran out the door to catch the bus.  On those days, we'd come home to rows of the chewy, chocolatey oatmeal cookies cooling on the counter.  How she didn't eat them all while we were away and they were sitting out like that, I'll never know, but they were always a welcome sight!


Double Chocolate Oatmeal Cookies:
1 1/2 cups sugar
1 cup (2 sticks or 16 tablespoons) butter softened or margarine
1 egg
1/4 cup water
1 teaspoon vanilla extract
1 1/4 cup flour
1/3 cup baking cocoa
1/2 teaspoon baking soda
1/2 teaspoon salt
3 cups quick cooking rolled oats
1 cup milk chocolate chips

Preheat oven to 350 degrees.  In a large mixing bowl, cream together butter and sugar.  Add egg, water and vanilla and mix thoroughly until fully combined.  In another bowl or on a piece of waxed paper, sift together flour, cocoa, baking soda and salt.  Stir into wet ingredients and mix just until a soft dough is formed.  Stir in oats and chocolate chips.   Drop cookie dough by tablespoonfuls about 1" apart onto an ungreased cookie sheet.  Bake at 350 degrees for 9-12 minutes or until cookies are set, but centers are still soft (not wet).  Remove from oven, allow to cool 5 minutes on cookie sheet, then remove with a spatula and transfer onto a cooling rack or layers of paper towels to finish cooling.  Makes about 3 dozen cookies.

Tuesday, May 31, 2011

Mini Pineapple Muffins with Coconut Crumble


And, while I'm on a tropical theme (see the last post on Key Lime Bars)...
Last week, I needed to throw together a baked good (and something that I actually had ingredients in my pantry for) for my Bible study girls quickly!  I came across the concept of a pineapple muffin with coconut crumble and I'm so glad I gave these a try!  These sweet little muffins are buttery but still light and the pineapple makes them moist.  The coconut crumble topping adds a perfect, caramel-y, crunch to the soft muffin underneath.  The mini size was perfect for toddlers and mommies alike and there were plenty to go around.  If you don't have access to a mini muffin pan, don't despair, you can bake them regular size too, just increase the baking time to 18-20 minutes!


Pineapple Muffins:
3/4 stick (6 tablespoons) butter, softened
1/2 cup granulated sugar
1 large egg
1/2 cup milk
1 cup crushed pineapple in juice, undrained
1 teaspoon vanilla extract
2 cups all purpose flour
1 tablespoon baking powder
1/4 teaspoon salt
Coconut Crumble
1/2  cup brown sugar, packed
2 tablespoons reserved flour mixture
1 tablespoon butter, softened
1/2 cup sweetened shredded coconut

Preheat oven to 400 degrees.  Spray mini muffin tin with cooking spray (or fill cups with paper liners).  Set aside.

In a small bowl, stir together flour, salt and baking powder.  Remove 2 tablespoons of mixture and reserve for crumble.  Set aside remaining flour mixture for later.

To prepare crumble, stir together brown sugar, 2 tablespoons flour mixture and butter with a fork until butter is worked in and mixture is crumbly.  Stir in coconut and set the mixture aside.
 
For muffin batter, in a medium mixing bowl, cream together 6 tablespoons softened butter and sugar.  Beat until fluffy.  Add in egg, milk, pineapple with juice and vanilla.  Blend together just until combined.  Scrape down sides of bowl with a spatula and fold in the flour mixture, stirring just until combined.  The batter will still be lumpy.  Spoon or scoop by tablespoons into prepared muffin tins. Sprinkle teaspoons of crumble topping on each muffin and press down gently.  Place muffin pan in the oven.

Bake for 12-14 minutes or until muffins are golden brown and spring back when lightly pressed with a finger.  Remove from oven and allow to cool for a few minutes.  Use a butter knife around the edge of each muffin to remove if necessary.  Serve warm or at room temperature.

Recipe Adapted from: "Cupcakes! From the Cake Doctor" by Anne Byrn

Monday, May 2, 2011

Maple Almond Butter Cookies


This was a recipe I wasn't completely sold on.  Sure, I was intrigued by the idea, something like a peanut butter cookie but made with almond butter (not to be confused with a "butter cookie" with almonds...although now that I mention it, that sounds interesting too, I now have visions of little Dutch windmill cookies dancing through my head). 

The vegan batter tasted pretty good (no raw eggs to contend with so the dough was fair game!) and I don't think I could make a much healthier cookie if I tried.  But when they came out of the oven, I was disappointed.  They just weren't as good as I was hoping and I figured that it would just go in the "misses" pile. 

That was last night. 

This morning, I thought I should give them one last try.  Wow.  The cookies were soft, nutty and just slightly maple-y sweet.  I had to make myself stop after one knowing I'd already eaten breakfast (although these are so healthy, they could actually pass as a "breakfast cookie").  I'm starting to think of new variations I could play around with--adding some chopped dates or orange zest, dried cranberries or some cinnamon, substituting honey (not vegan) or agave for the maple syrup...there's a lot of potential in these power-packed bites!


Maple Almond Butter Cookies
makes 18-20 cookies
1/2 cup creamy natural style almond butter (could also try it with peanut butter)
1/2 cup maple syrup
2 tablespoons vegetable oil (I used the oil on the top of the jar of the almond butter that I couldn't stir back in and that worked well!)
1/2 teaspoon vanilla extract
1/2 teaspoon almond extract (or just just double the amount of one or the other)
1/2 cup whole wheat pastry flour (you could try white flour, it would just be less nutritious or regular whole wheat flour for an even more rustic cookie)
1/2 teaspoon baking soda
1/2 teaspoon salt
1/2 cup chopped almonds (I used some "Almond Accents" brand sliced toasted almonds)

Preheat oven to 350 degrees F.  In a medium mixing bowl, stir together almond butter, syrup, oil and extracts.  In a separate bowl (or let's be honest, I hate to make extra dirty dishes so I just threw the dry ingredients on top of the wet and mixed them together carefully before stirring the whole mess together--there's a reason why I can be a bit hit and miss in my baking), stir together dry ingredients and then stir into almond butter mixture, stirring just until combined.  Roll heaping teaspoons into balls, place about 2 inches apart on a cookie sheet.  Flatten slightly.  Bake 8-10 minutes or until firm on the edges, but still soft.  Remove from oven and cool completely.  Taste even better the next day! 

Recipe source: Sweet+Natural

Sunday, May 1, 2011

Carrot Ginger Soup


I love the combination of carrot and ginger but had somehow forgotten about it until Easter when my friend, Raelene (a really amazing cook!),  brought a delicious carrot and ginger soup to our Easter lunch celebration.  Since then, I haven't been able to stop thinking about it and decided to come up with my own version the other day.  The sweetness of the carrots and the bite of the ginger combined in a smooth, creamy soup is really fantastic.  We topped ours with some plain Greek yogurt (and the leftovers with honey yogurt which was great too!) and garnished with some sweet little chives that are starting to poke up in my Dad's garden.  Ahh, Spring.  Now, if the weather would just start acting like it (we had flurries on May day here in Minnesota today!)... 
 
Carrot Ginger Soup
2 tablespoons olive oil
1 small onion, diced (about 1 cup)
8 oz. carrots, peeled and cut into bite sized pieces
1 2 inch piece fresh ginger root, peeled and chopped 
4 cups chicken or vegetable stock
large pinch of nutmeg (about 1/8 teaspoon)
1/2 cup half and half
salt and pepper to taste
plain Greek yogurt and fresh snipped chives for garnish and serving, optional

In a large sauce pan, saute onion in olive oil over medium high heat until softened.  Add carrots and ginger root and saute for about two minutes more.  Pour in chicken stock, cover and bring to a boil.  Reduce heat to medium low and simmer until carrots are very tender (about 15-20 minutes).  Using an immersion blender (or if you don't have one, puree in batches in either a blender or food processor--but be very careful to avoid burns!), puree the soup until smooth.  Stir in half and half and season to taste with salt and pepper.  To serve, ladle into bowls or mugs and top with a dollop of yogurt and top with chives (optional).  This soup is good served hot or cold.

Saturday, April 30, 2011

Quick Strawberry Balsamic Vinaigrette over Spinach Salad


Homemade salad dressing doesn't get much easier, or tastier, than this sweet and tangy vinaigrette.  Usually, I make the dressing with raspberry preserves (and you should try doing that sometime, too!), but strawberries and balsamic vinegar are a classic combination and make for a fresh, seasonal dressing.  Shake it up in a glass jar for an instant salad topper and to keep the leftovers (if there are any).
 Strawberry Balsamic Vinaigrette
1 teaspoon Dijon or brown grainy mustard
2 tablespoons seedless strawberry preserves or all fruit preserves (try raspberry or apricot for a twist)
2 tablespoons balsamic vinegar
2 tablespoons olive oil
salt and fresh ground pepper to taste

In a small jar with a lid, stir together mustard and preserves until smooth.  Pour in balsamic vinegar.  Top with olive oil.  Fit lid of jar securely and shake vigorously until vinaigrette is well-combined and is thick and smooth.  Season to taste with salt and pepper as needed, shake again to combine.  If you make the dressing ahead of time, shake the jar just before serving.  Pour over prepared salad as desired.

Suggested Salad:
Fresh baby spinach leaves
walnut pieces (toasted, optional, sliced almonds would be good too!)
fresh sliced strawberries
crumbled goat cheese (or blue or feta)
fresh ground pepper to taste
thinly sliced red onion (optional)

Toss together all salad ingredients in a large or individual bowls.  Drizzle with salad dressings. Serve immediately.

Wednesday, April 27, 2011

Moroccan Cauliflower and Chickpea Curry

I confess, I can not attest to how authentically "Moroccan" this dish actually is.  I just thought with the the bold flavors and colors and being served over couscous and all, it sounded a lot better than "Curried Cauliflower with Tomatoes, Sweet Potatoes and Chickpeas over Couscous."  That would've been a mouth full. Phew!

Anyway, last week, Good Friday and Earth Day fell on the same day.  In honor of my Catholic, Lent-observing roots and in attempt to reduce our Carbon Footprint for the day, we had this delightful Vegetarian meal.  I'd had a head of cauliflower in the fridge and for some reason had really been wanting to pair it with curry.  Now curry can be a bit of an acquired taste, but once you like it, it's hard to stay away.  Coming from someone who took awhile to appreciate curry, if you don't think it's for you, keep trying.  One of these times I think you'll end up pleasantly surprised! 

Finally, this is one of those magical recipes that tastes even better the next day.  Make extra (or leave some leftovers) and pack into individual servings for lunch over the week.  You'll feel prepared and exotic!

Moroccan Cauliflower and Chickpea Currymakes about four large servings
1-2 tablespoons olive oil
1 head cauliflower (about 1 pound), cut into bite-sized pieces
1 small sweet potato, peeled and cut into bite-sized chunks
kosher salt
2 tablespoons butter
1 small onion, finely chopped
1 piece fresh ginger (about 1 inch chunk) peeled and minced
2 tablespoons curry powder 
2 small tomatoes chopped, or 1/2 15.5oz can of petite diced tomatoes
1 15.5 oz can chickpeas, drained and rinsed
salt and pepper to taste
fresh chopped cilantro leaves (about a 1/4 cup or more to taste)
hot cooked couscous or rice (a gluten-free option!) for serving

Preheat oven to 425 degrees.  On a baking sheet, toss cauliflower and sweet potato pieces with olive oil and sprinkle with Kosher salt.  Spread in a single layer (using two baking sheets if necessary) and  roast, tossing occasionally, until sweet potato chunks are tender but still firm and the edges of the cauliflower pieces are browned (about 20-25 minutes).  Remove from oven and set aside.

Meanwhile, in a large skillet, melt butter over medium high heat.  Saute onion, ginger and curry powder stirring frequently until onion is softened and the curry and ginger are fragrant, about 2-3 minutes.  Add tomatoes and cook, stirring to break down the tomatoes.  Add 1/2 cup water, chick peas, cauliflower and sweet potato and raise heat to high.  Cook, stirring frequently for a couple minutes until sauce is reduced and thickened.  Season to taste with additional salt and pepper, if needed.  Stir in about 2 tablespoons of chopped cilantro, reserving the rest for garnishing individual servings.  Serve over hot cooked rice or couscous.

Sunday, April 10, 2011

Broccoli Madness Salad


We are fortunate enough to live in a state that has the salad bar restaurant, "Sweet Tomatoes" (aka "Soup Plantation" in some states).  There, they have this magnificent salad known as "Joan's Broccoli Madness" that is comprised of crunchy, raw broccoli studded with raisins, bacon and cashews all tossed in a creamy dressing.  I will tell you in all honesty (and this is coming from a true vegetable-loving person) this is one of the very few ways I'll even eat raw broccoli.  It's so good.  My husband and I like it so much that he and I ate the entire batch in one sitting and because it's a lightened version, didn't feel too guilty.  This recipe is a great addition to showers (I think I first tried a version of this salad at my sweet friend, Helen's classy, Southern-style, Bridal luncheon and it forever holds a dear place in my heart because of it), cook outs and pot lucks. Getting your serving of veggies never tasted so good.


Broccoli Madness Salad
1 pound raw broccoli florets, cut into bite-sized pieces
1/2 cup raisins
1/2 cup cashew pieces or sunflower seeds (for a just as delicious, more budget-friendly option)
1/4 cup finely diced red onion
1/2-3/4 cup extra crispy bacon pieces
1/2 cup light mayonnaise
2 tablespoons white vinegar
2 tablespoons white sugar
1-2 tablespoons milk
fresh ground black pepper
1/4 teaspoon garlic powder

In a large bowl, toss together broccoli florets, raisins, cashews and red onion.  Reserve bacon pieces until after adding dressing so that they stay crispy (I can't stand wiggly bacon, yuck!).  Set aside.  In a small bowl, whisk together mayonnaise, vinegar and sugar.  Add milk, as needed, until it reaches a thick, pourable consistency.  Season to taste with pepper, garlic powder and any additional sugar or vinegar, if needed.  Pour over broccoli mixture, tossing to combine.  Add bacon pieces and allow salad to sit for about 10 minutes to allow flavors to meld.

Variation: substitute 1/2 cup dried sweetened cranberries (Craisins) for raisins.  I have also heard of adding shredded sharp cheddar cheese to the mix but I guess I'm a purist and leave it out, but feel free to add it to the party if you feel so inclined! 
Inspired by Joan's Broccoli Madness Salad by Sweet Tomatoes restaurant 

Thursday, April 7, 2011

Easy Fried Rice

I know I have mentioned this before, but growing up, my very few experiences with restaurant food was almost entirely relegated to Asian take out.  What can I say, my Dad hasn't met an egg roll he didn't like.  Fried rice was always a staple of our order and it always seemed like a real crowd-pleaser.  I have just realized that I imagine Chinese restaurants are very happy when people order fried rice.  Why, you ask?  Because it's best made with LEFTOVER rice!  What a great way to cut down on product waste!  That said, it's a delicious use of leftovers and so unbelievably simple to recreate at home, it makes me think twice about ordering it in a little paper box again.  

Easy Fried Rice
(makes two large meal sized portions or four sides)
2 cups leftover cold cooked rice
3 eggs
cooking spray
salt and pepper
1/2 cup diced carrots
1/2 cup pea pods (optional)
1-2 tablespoons vegetable oil
1 tablespoon sesame oil
1-2+ tablespoons light soy sauce
1/2 cup frozen peas
1/2 cup bean sprouts (optional)
3 green onions, green and white parts, thinly sliced
1/2 cup leftover cooked meat of your choosing, cut into bite-sized pieces *see note*
 
Lightly beat the eggs and scramble with salt and pepper in a wok or large frying pan coated with cooking spray.  Once eggs are scrambled, break up into bite-sized chunks (if they aren't already), remove from pan and set aside.  Return pan to stove and over high heat, add diced carrots and pea pods (if using) and 1/3 cup water.  Boil vegetables uncovered until water evaporates and vegetable are crisp-tender (watch closely so they don't burn, the water will be gone quickly).  Remove from pan and set aside with the eggs.   Return the pan to high heat, add 1-2 tablespoons of vegetable oil and sesame oil so you have a decent film over the bottom of the pan.  Add the rice and stir fry for a couple minutes, stirring frequently to break up any chunks of rice.  Once rice is heated through, add soy sauce to taste.  Return eggs and vegetables to rice mixture.  Add frozen (the heat of the rice will thaw them quickly) peas, bean sprouts (if using) and any diced, cooked, meat desired to the pan and cook an additional minute, stirring frequently, until mixture is heated through.  Serve immediately, chopsticks optional. 

*Note: If you like meat in your fried rice you have a lot of potential options.  I used leftover chicken from a chicken and broccoli stir fry I had made the night before but pork chops basted with hoisin sauce is a really delicious addition and brings back happy memories of when my mom would make "Young Jewel Fried Rice" from the LeeAnn Chin Chinese Cookbook--was that just a Minnesota think?).  Really, just about anything works--you could even use leftover Thanksgiving turkey (I have done it and it turns out great!).

*You could even make fried rice from leftover restaurant take out (if you have any left--we always seem to have leftover white rice that starts to petrify in its little paper box).  And, you can use some remaining meat from an entree to turn your fried rice from side to main dish.  

Monday, March 28, 2011

Roasted Broccolini and Spaghetti con Aglio e Olio


Oh, broccolini, you are our new favorite vegetable!  Broccolini, or "Baby Broccoli" is not actually baby broccoli at all.  It is a cross between broccoli and Chinese kale and is similar to broccoli but is sweeter and has slim, tender, fully-edible stems (no waste!).  It's been available at SuperTarget lately in a package for $1.88.  Sweet! Normally, I'm not crazy about SuperTarget's produce (sorry, I love just about everything else about you, Red), but the broccolini has been a great find.  Roasted with a little bit of olive oil and salt, it makes a great side or addition to pasta (as shown here with Spaghetti con aglio e olio--garlic and olive oil--and sauteed chicken).  Roasting is great technique to apply to all kinds of vegetables (just follow the preparation below but adjust the time depending on what you're roasting--cauliflower is amazing, carrots are incredible, sweet potatoes cut into matchsticks are healthy fries! Delicious!). 


Roasted Broccolini
1 8 oz. package broccolini, washed (or substitute broccoli florets)
1-2 tablespoons olive oil
kosher salt and pepper

Preheat oven to 425 degrees.  Spread broccolini in an even layer on a baking sheet.  Drizzle with olive oil and sprinkle with salt.  Roast in oven for 12-15 minutes, or until crisp-tender and the edges begin to brown.  Season with pepper and additional salt to taste. 

 Spaghetti con Aglio e Olio
This is a super-simple, quick pasta dish that you probably already have almost all the ingredients on hand.  Don't be worried about the large amount of garlic, the flavor mellows and sweetens as it cooks.  Enjoy plain or add some sauteed chicken or shrimp and vegetables like the roasted broccolini (above).
(Closely adapted from Barefoot Contessa's "How Easy is That?")
kosher salt
1 pound dried spaghetti
1/3 cup good olive oil
8 large garlic cloves, cut into thin slivers
1/2 teaspoon crushed red pepper flakes
1/2 cup minced fresh parsley
1 cup freshly grated Parmesan cheese, plus extra for serving (I won't judge you for using the pre-shredded either since that makes a frequent appearance at our house)

Bring a large pot of water to a boil.  Add two tablespoons of salt and the pasta and cook according to package directions.  Set aside 1 1/2 cups of the pasta cooking water before you drain the pasta.  Return the pasta to the cooking pot and cover to keep warm.

Meanwhile, heat the olive oil over medium heat in a large skillet.  Add the garlic and cook for 2 minutes, stirring frequently, or until it just begins to turn golden on the edges--don't overcook it! Burned garlic turns bitter and cannot be salvaged.  Add the red pepper flakes and cook for 30 seconds more.  Carefully add the reserved pasta-cooking water to the garlic and oil and bring to a boil.  Lower the heat and simmer for about 5 minutes, until the liquid is reduced by about a third.

Pour the garlic sauce over the warm pasta and toss to combine.  Off the heat, add the parsley and Parmesan and toss well.  Allow the pasta to rest off the heat for 5 minutes for the sauce to be absorbed.  Taste for seasoning and serve warm with extra Parmesan on the side.